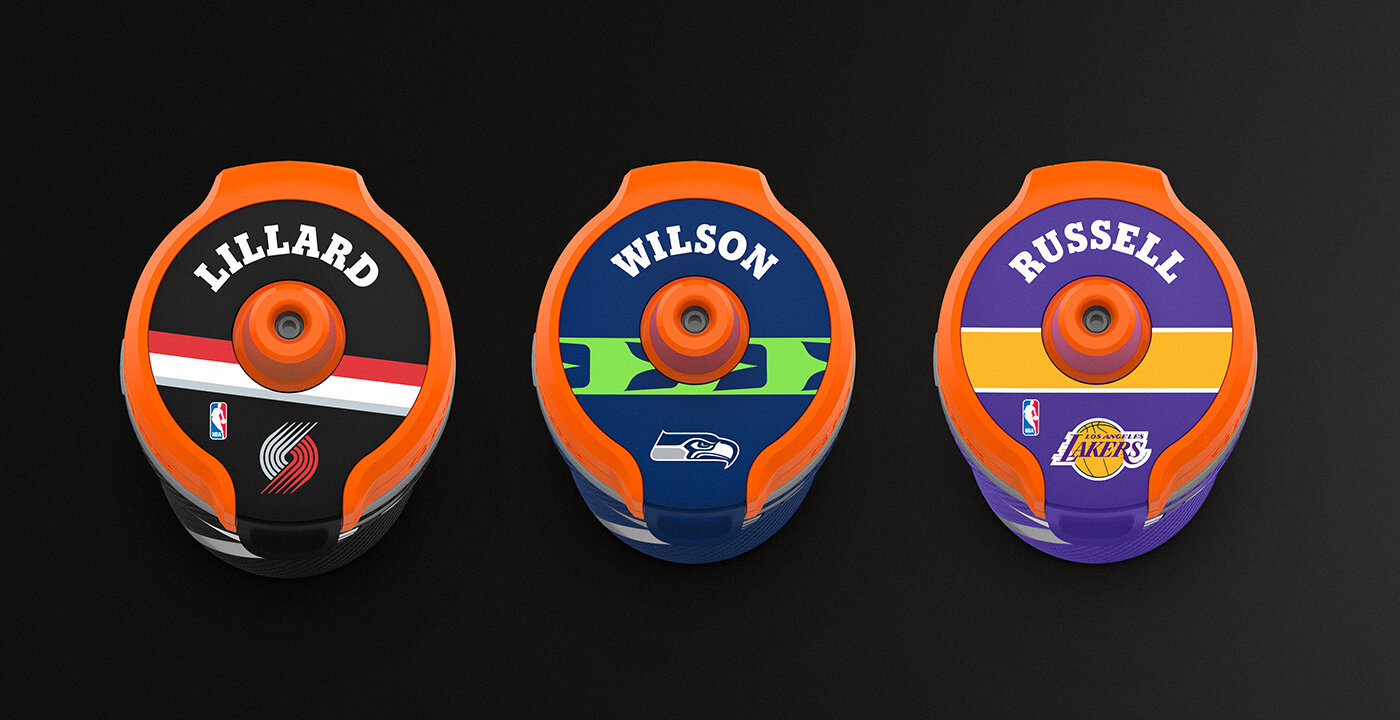
Customize your own personal water bottle
Endless
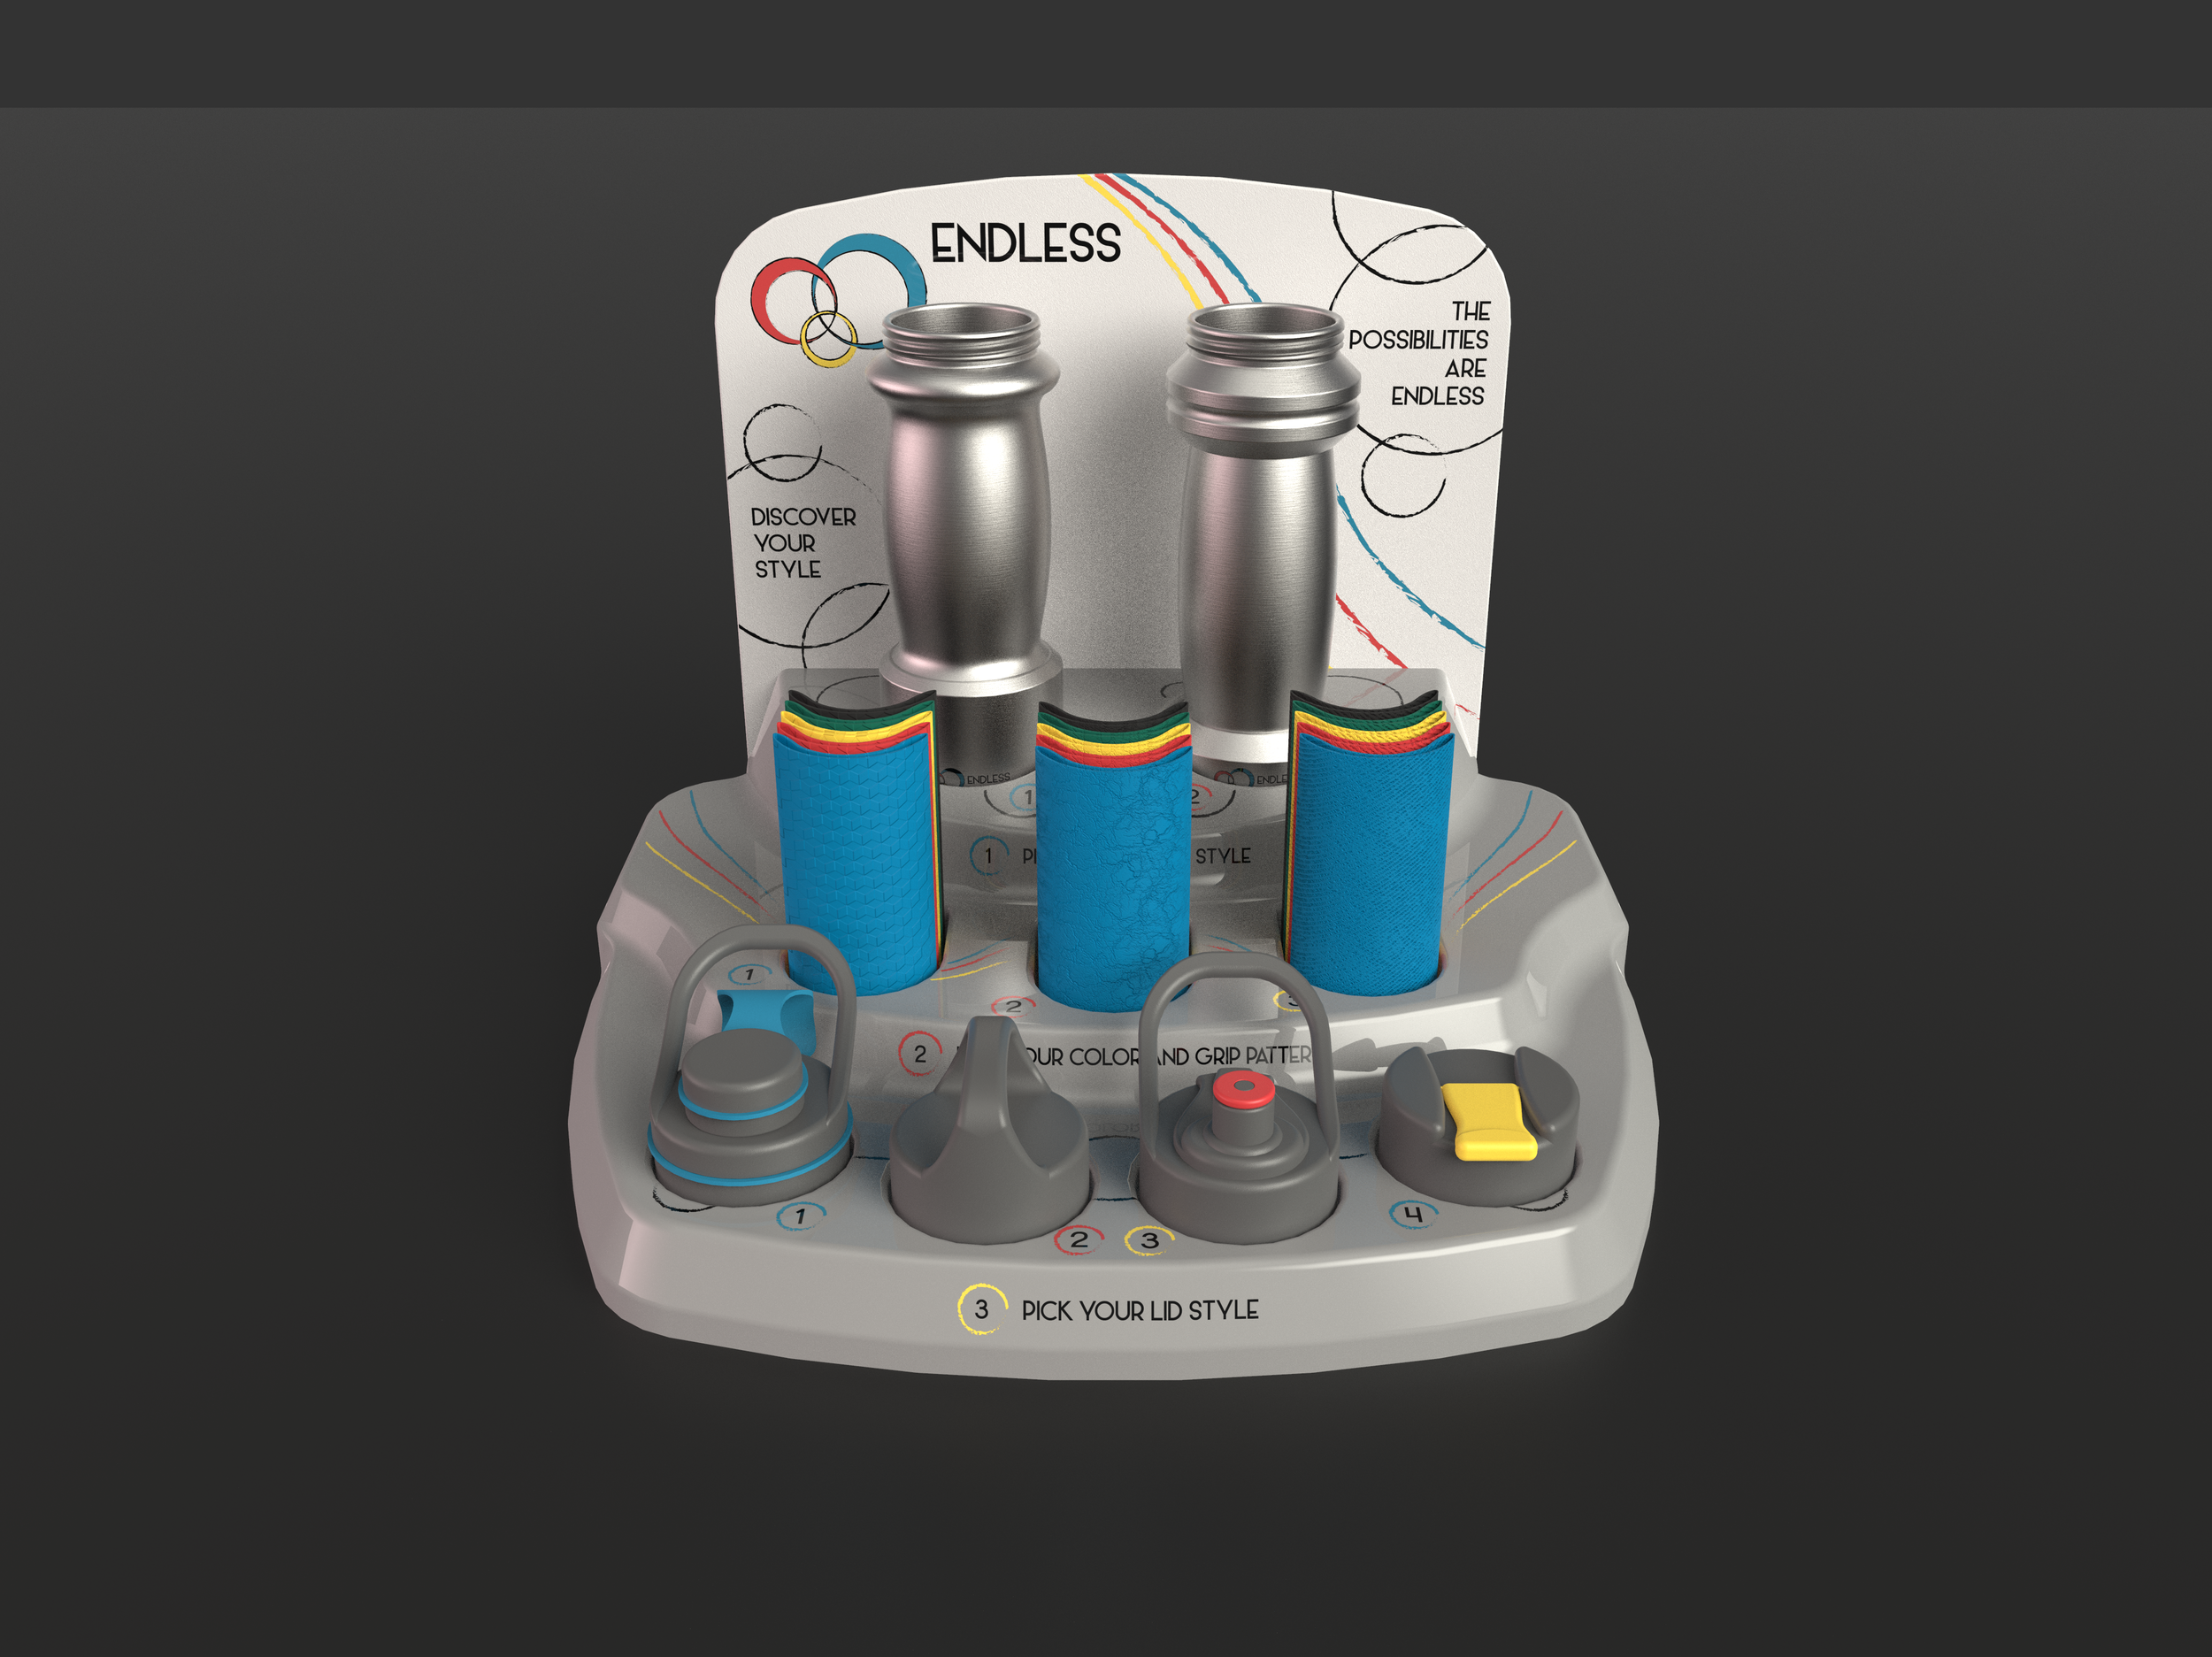
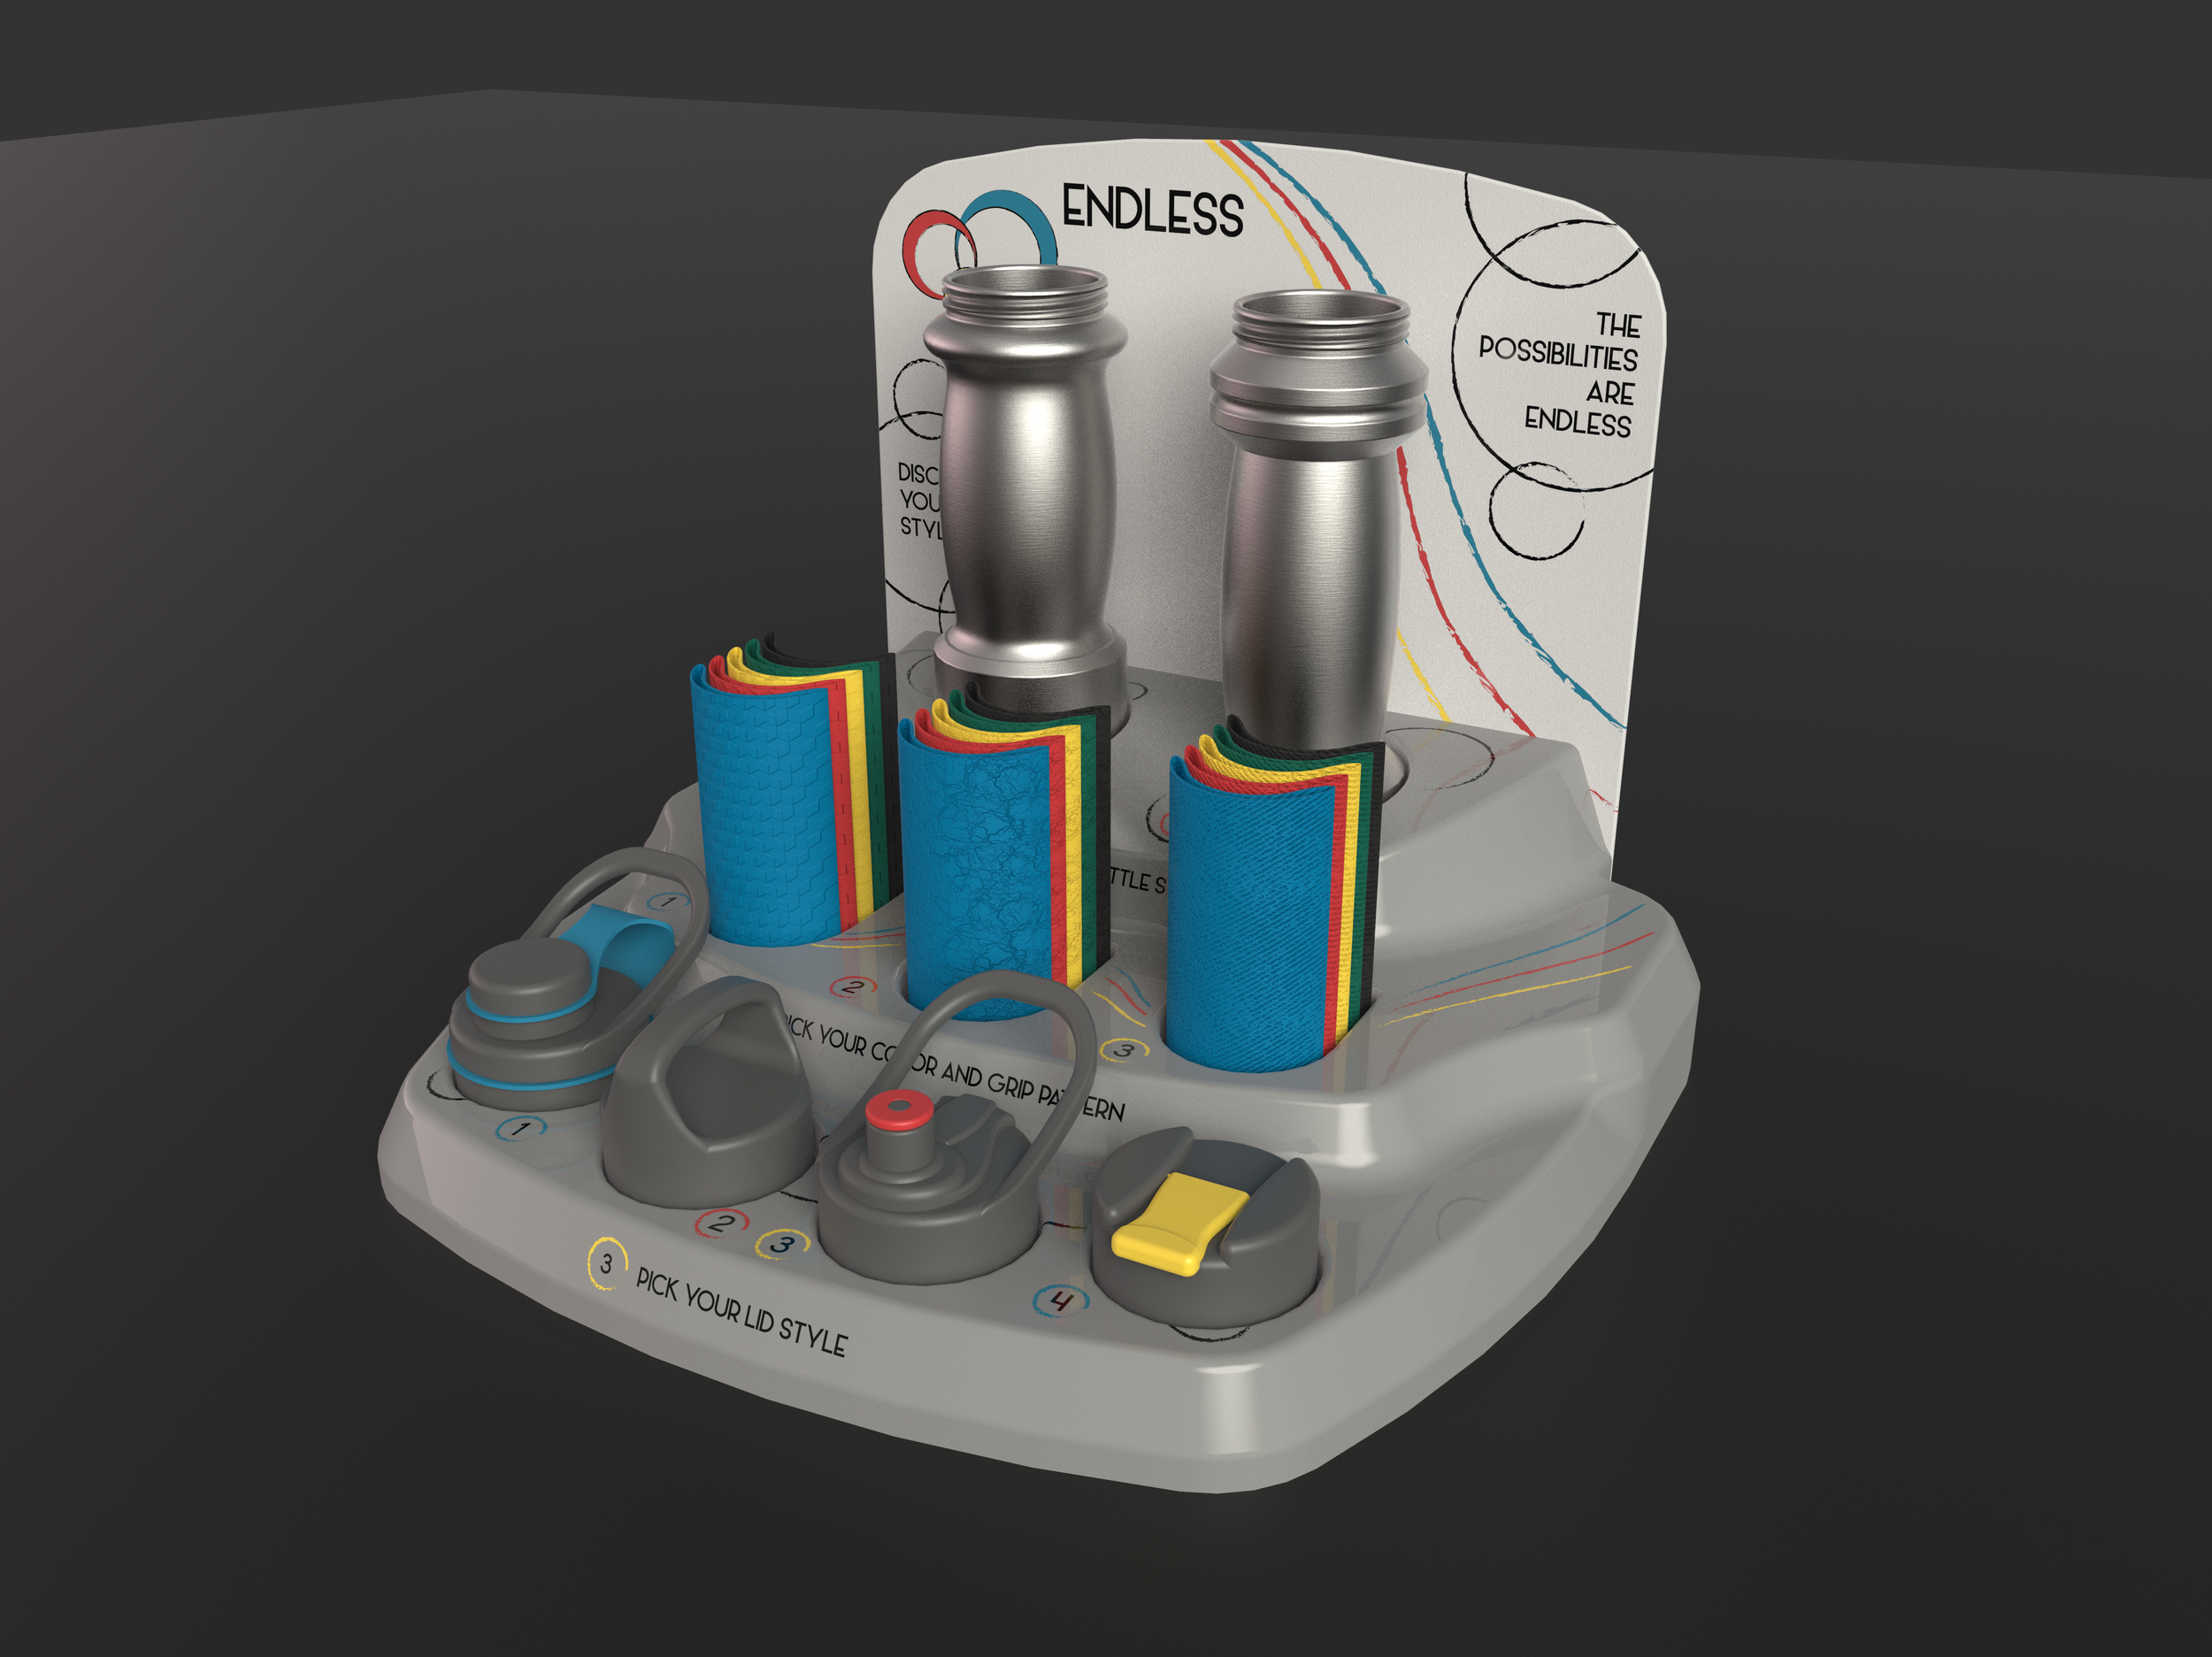
Customizable Water Bottle POS

Design Brief
Endless is a customizable water bottle with a point-of-sale display that highlights and shows the customization process.
This product plays off of the trend of human participation and what it would look like if the control was moved from the makers’ hands to the users’ hands. What if the user could drive the product’s end result?
The user gets to define what the products’ aesthetic is, what the product means to them, and what its use is to them.
Everything comes down to the user and their choices.
Set factor inspirations
Social
People crave communication and individuality. They want connection, interaction, and control.
Economy
Products that bring about feelings of excitement and novelty generate more revenue but cost more to make. People want options when they buy and they want options to communicate something about themselves.
Technology
The advancements in design and manufacturing have also allowed customization to become easier for the makers and the consumers.


goals & Objectives
The initial goals and objectives of this project were solely driven by the trend and the SET factors that defined the trend.

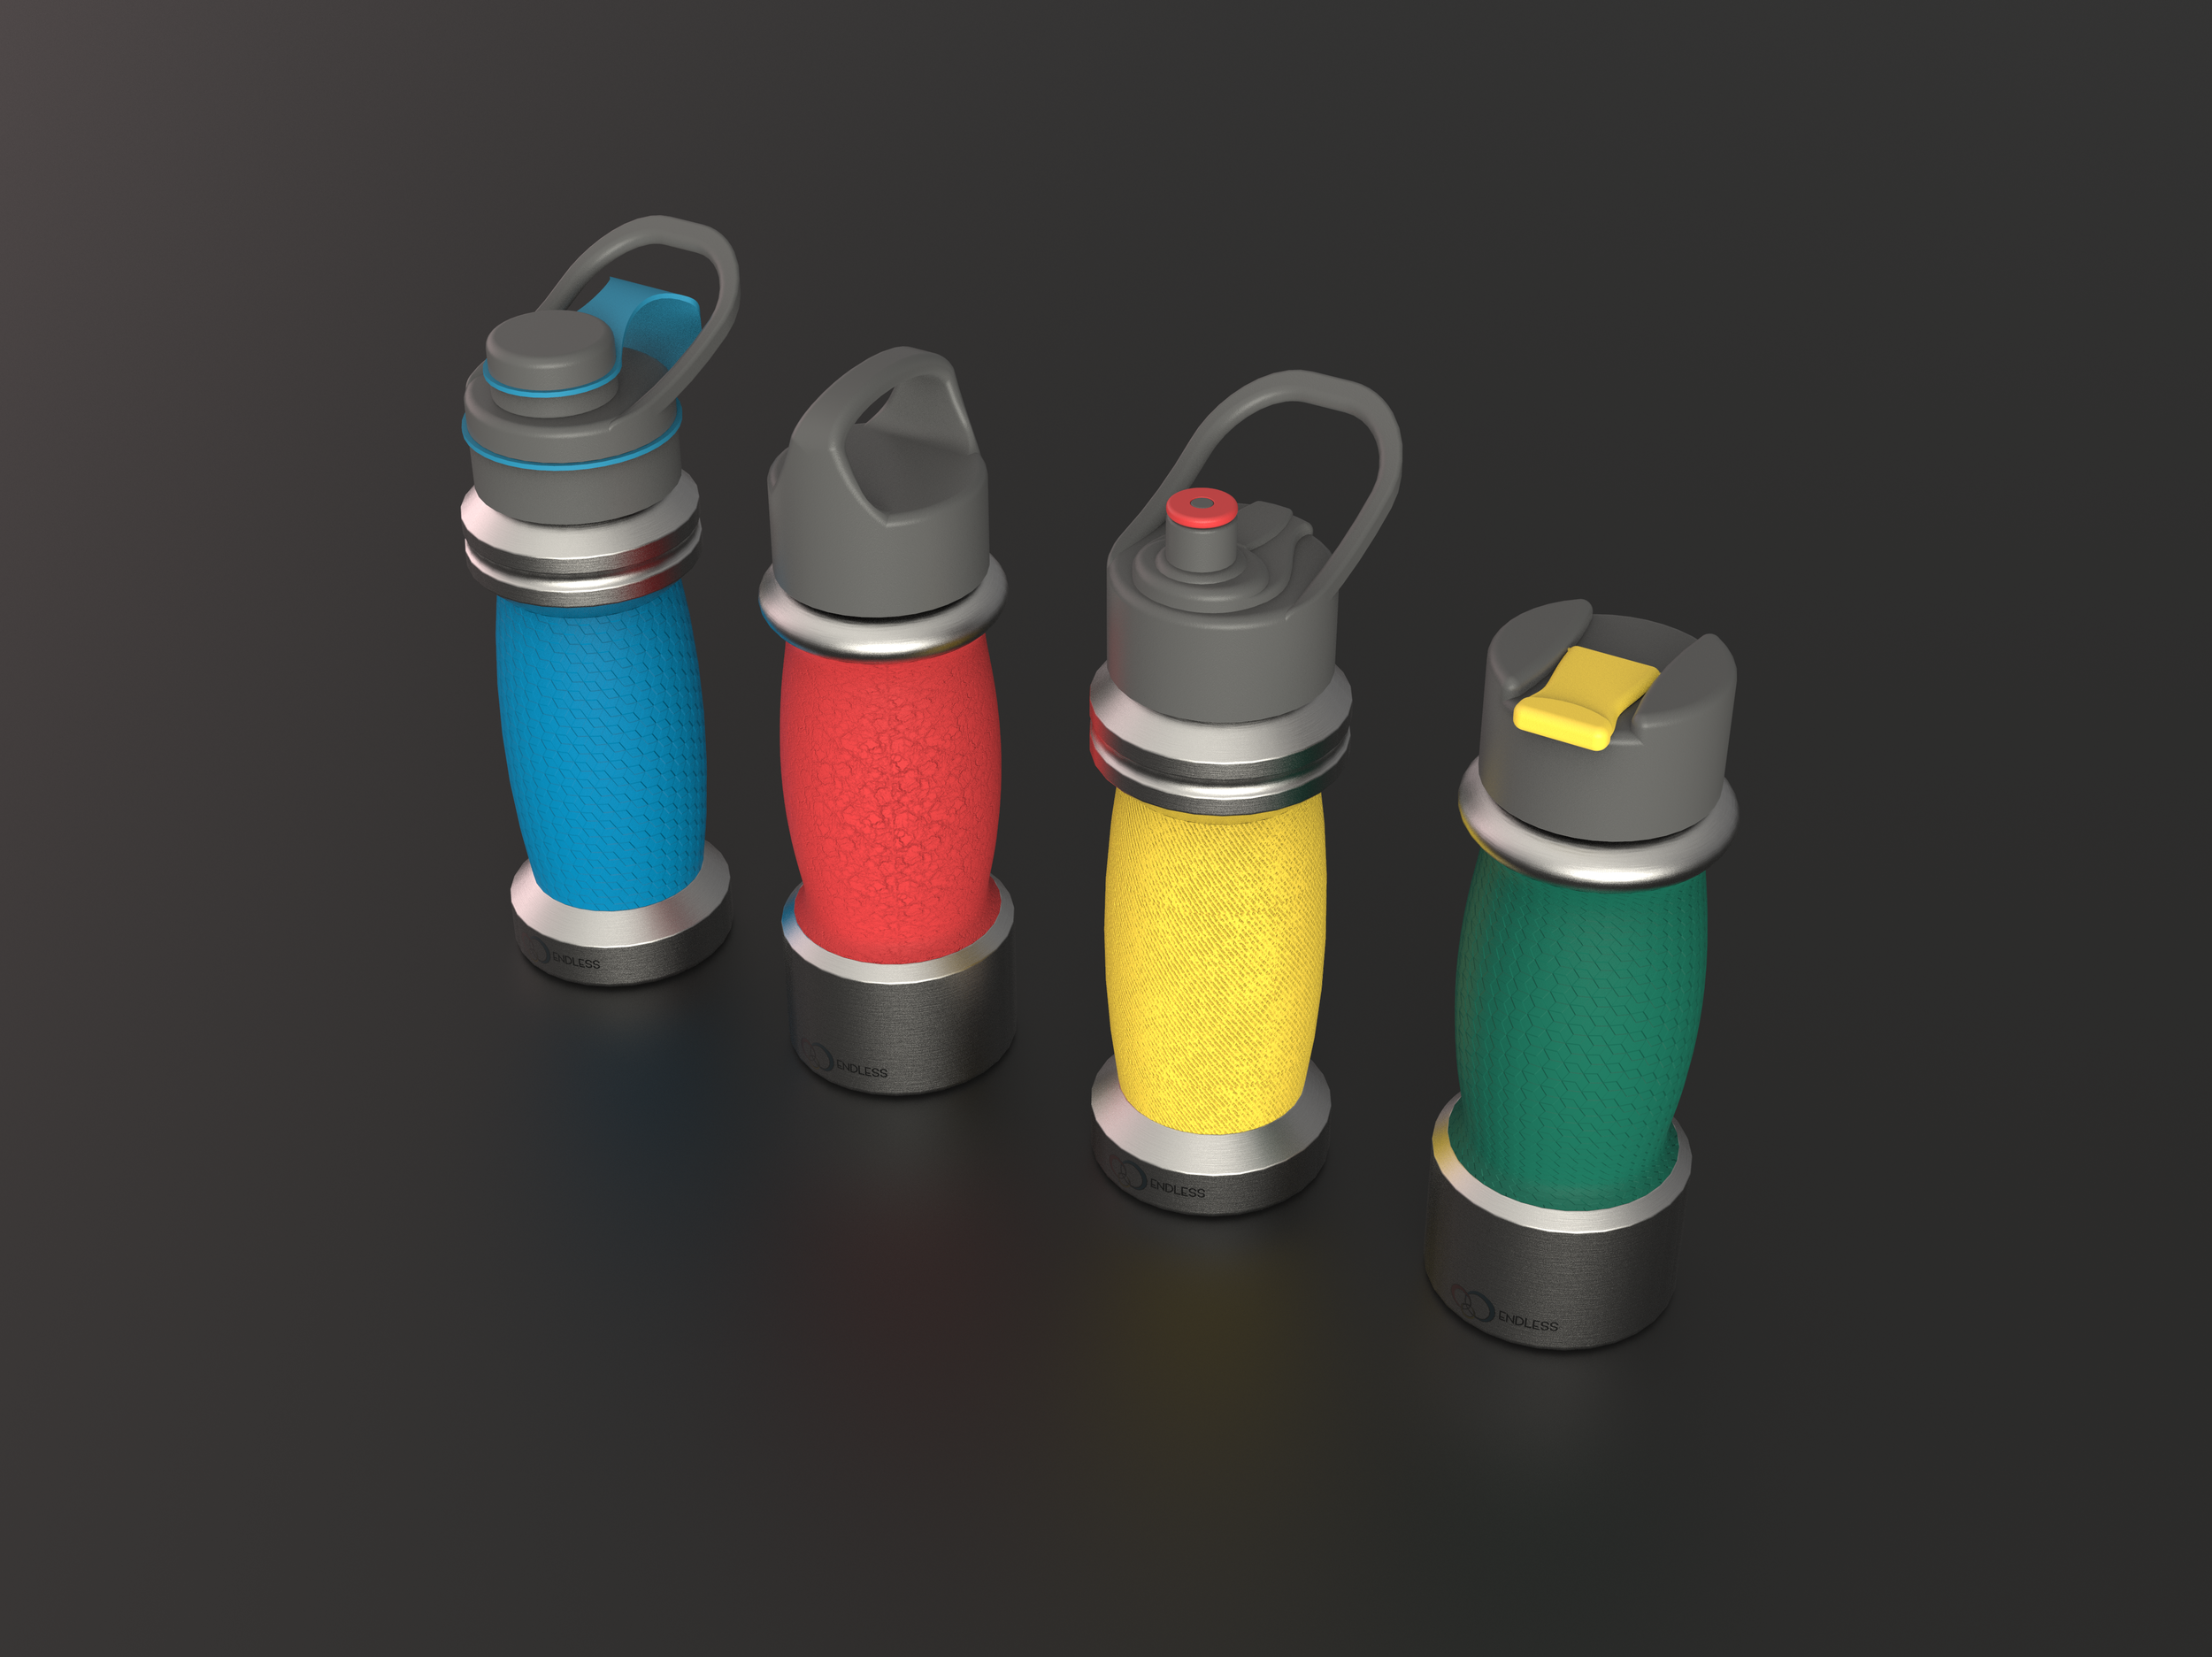
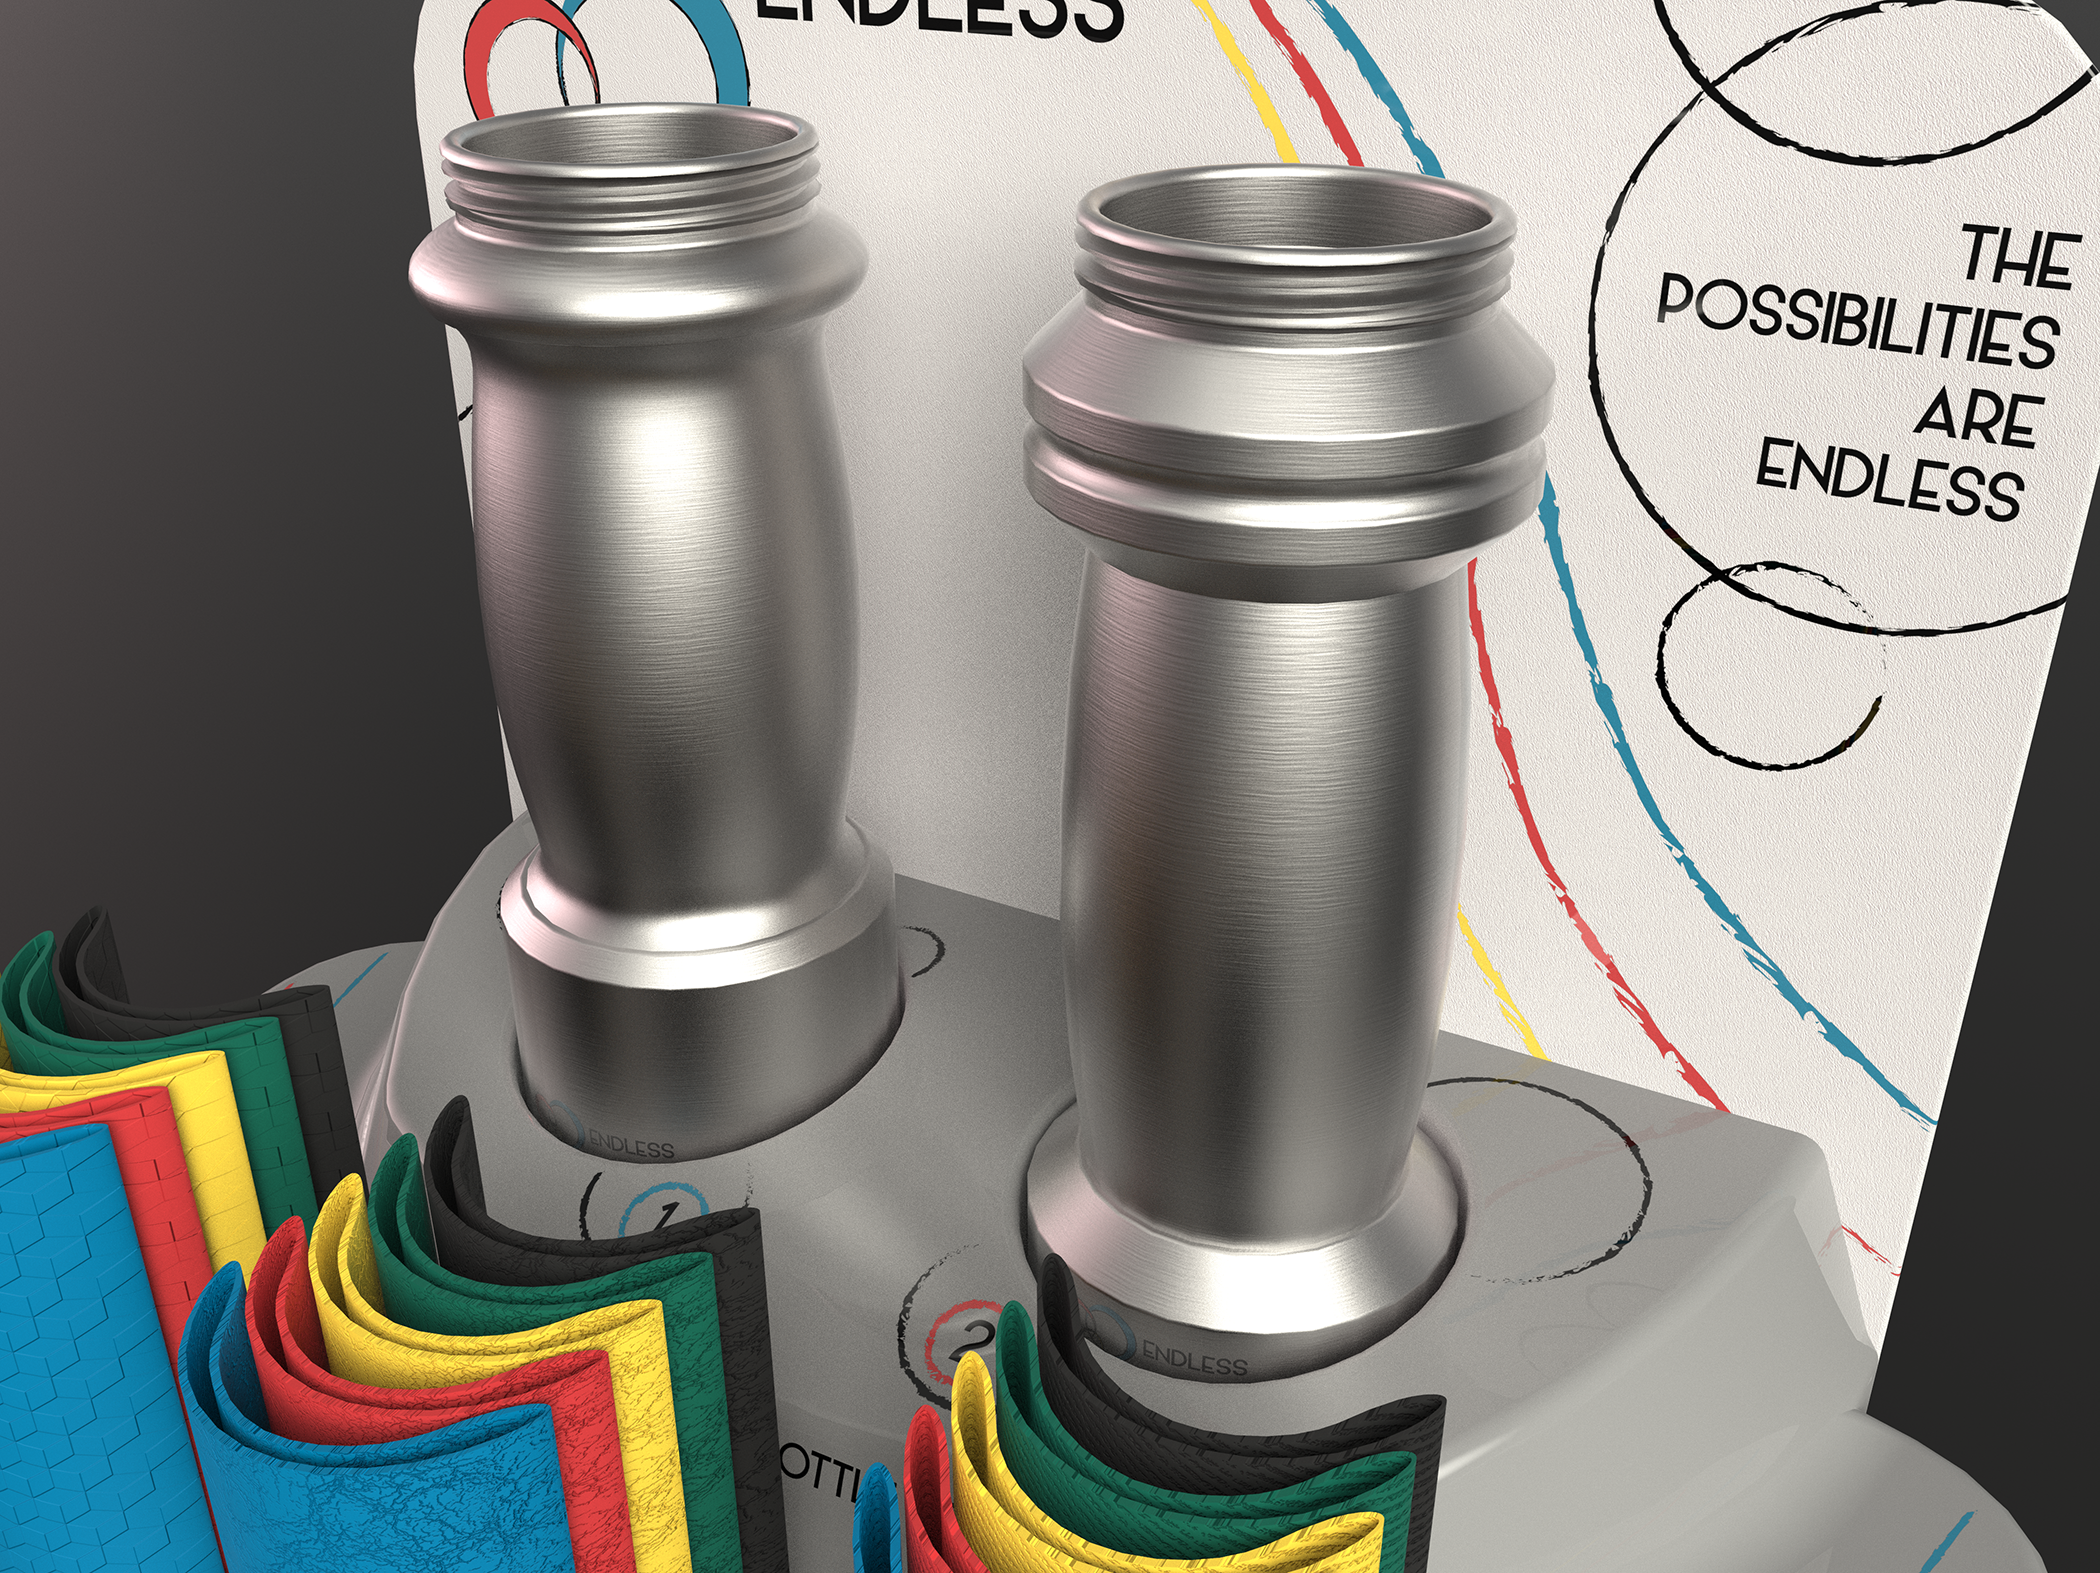
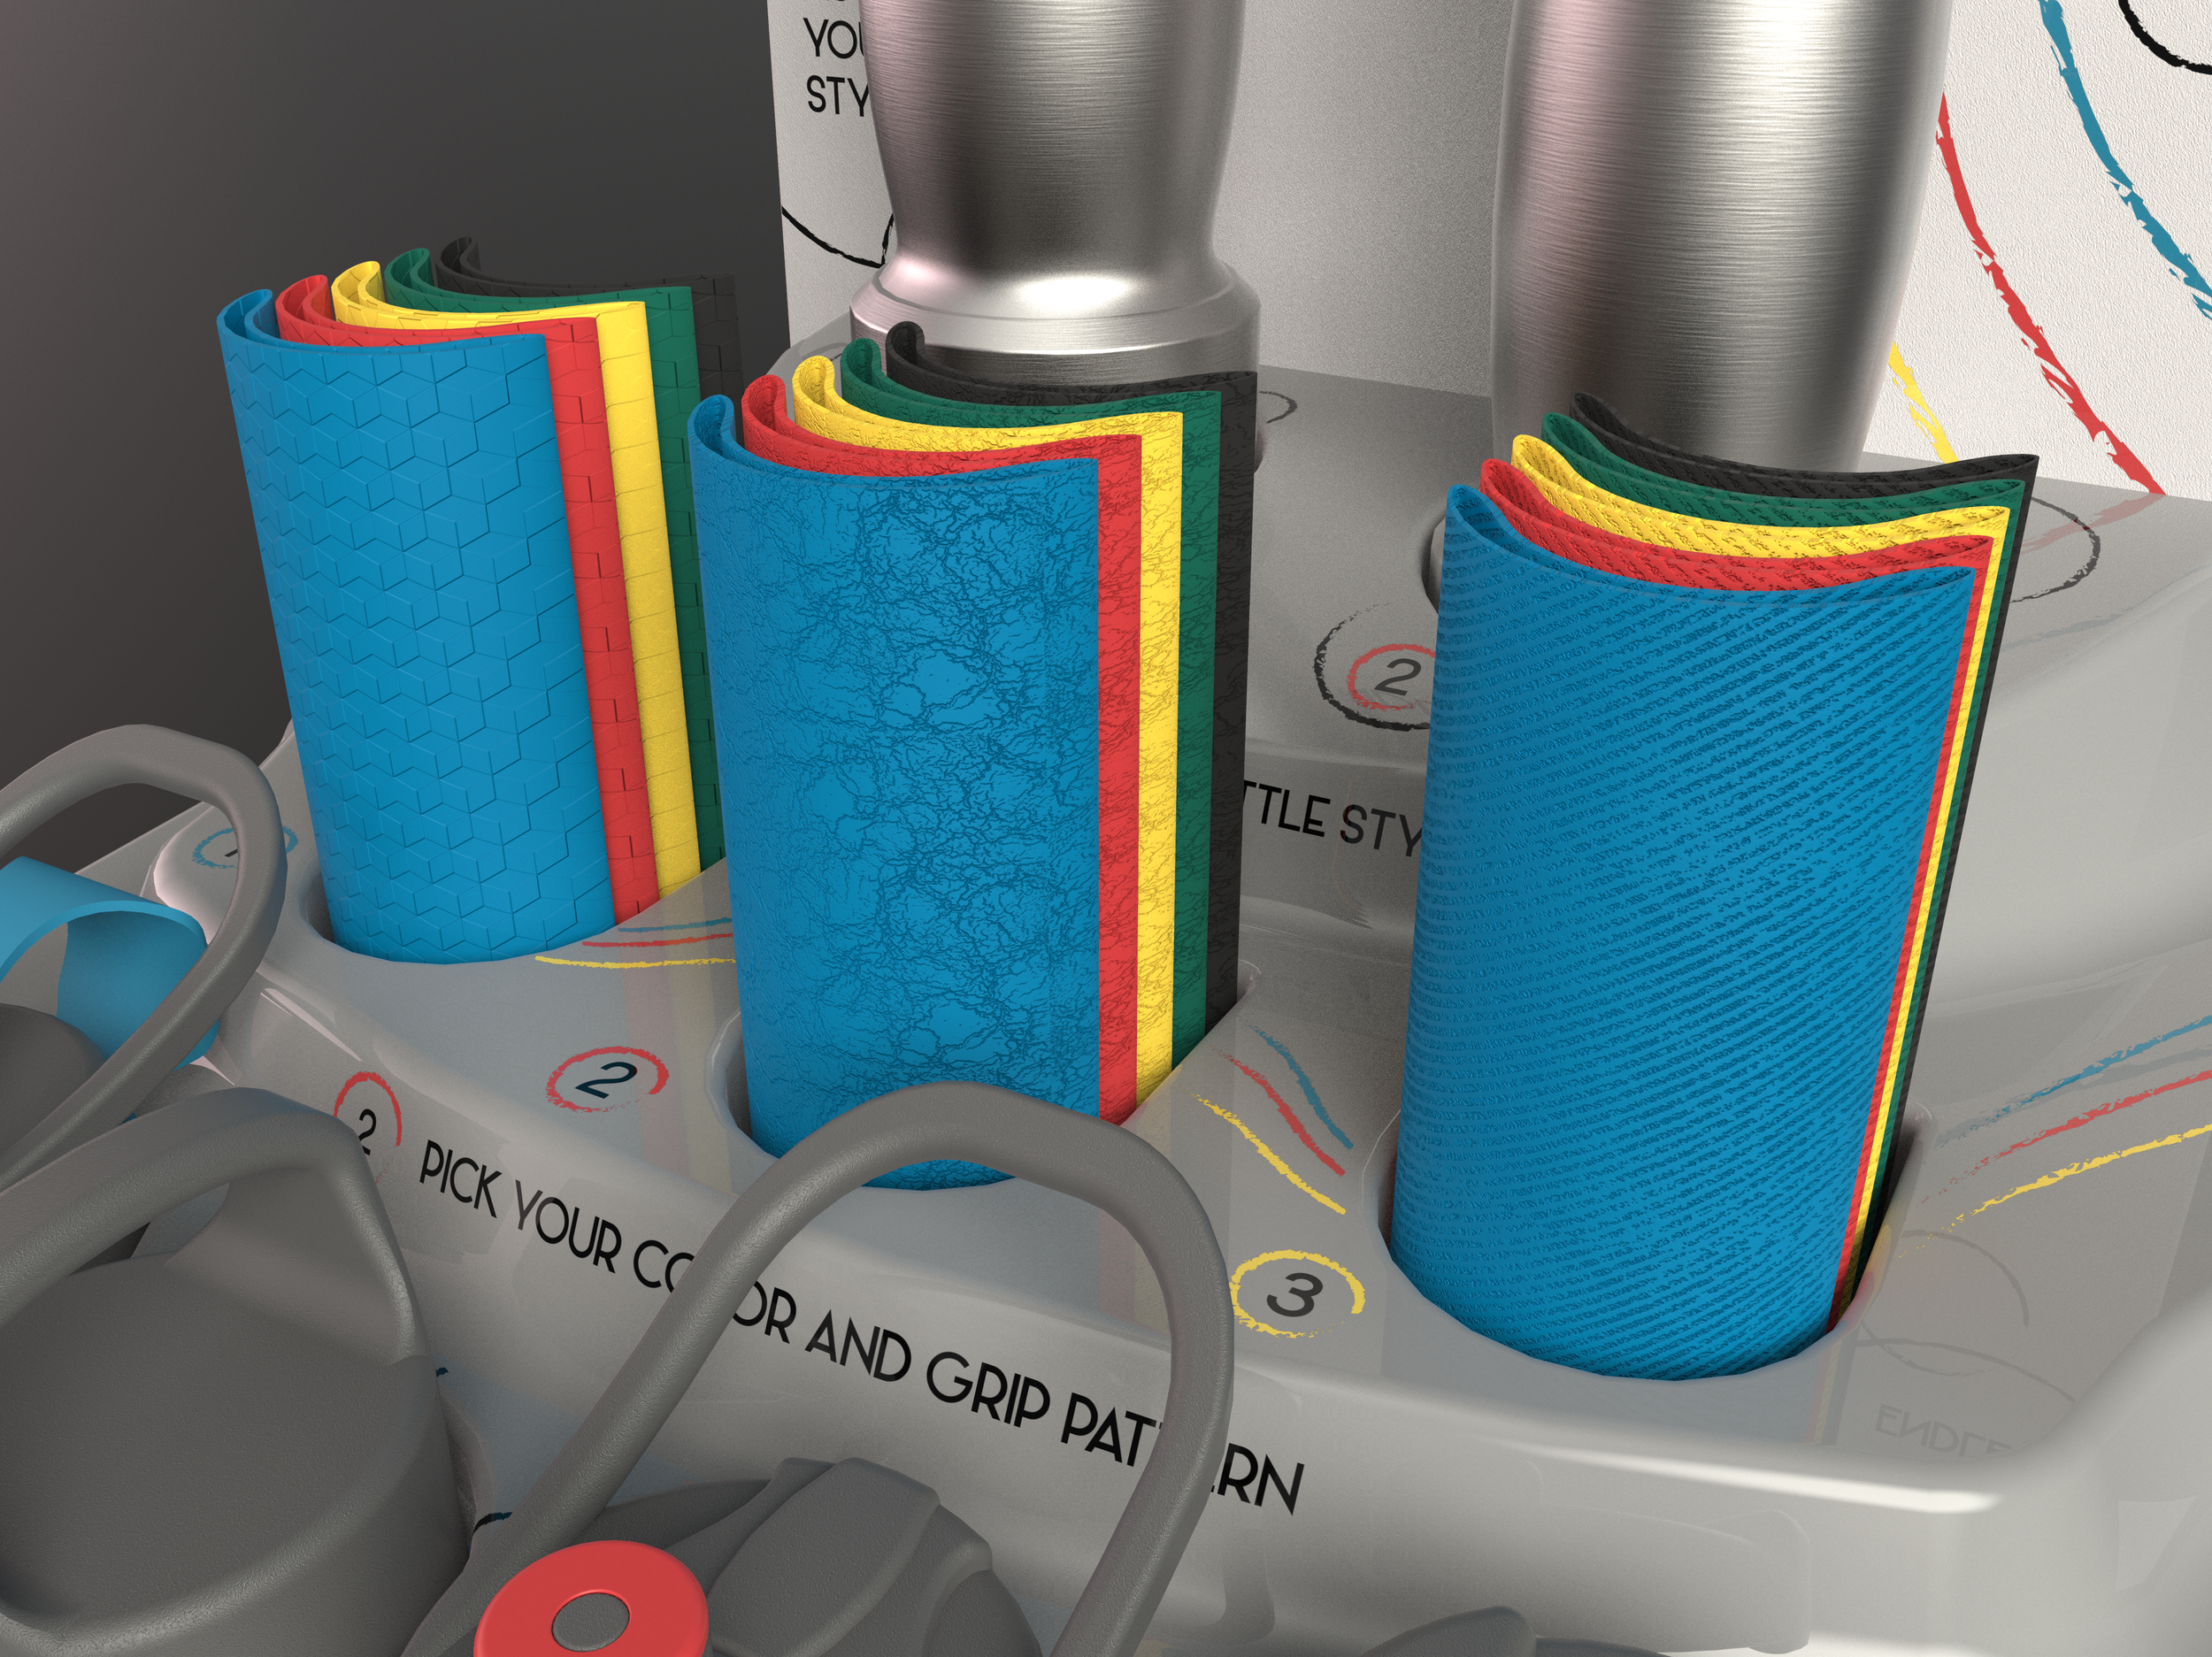
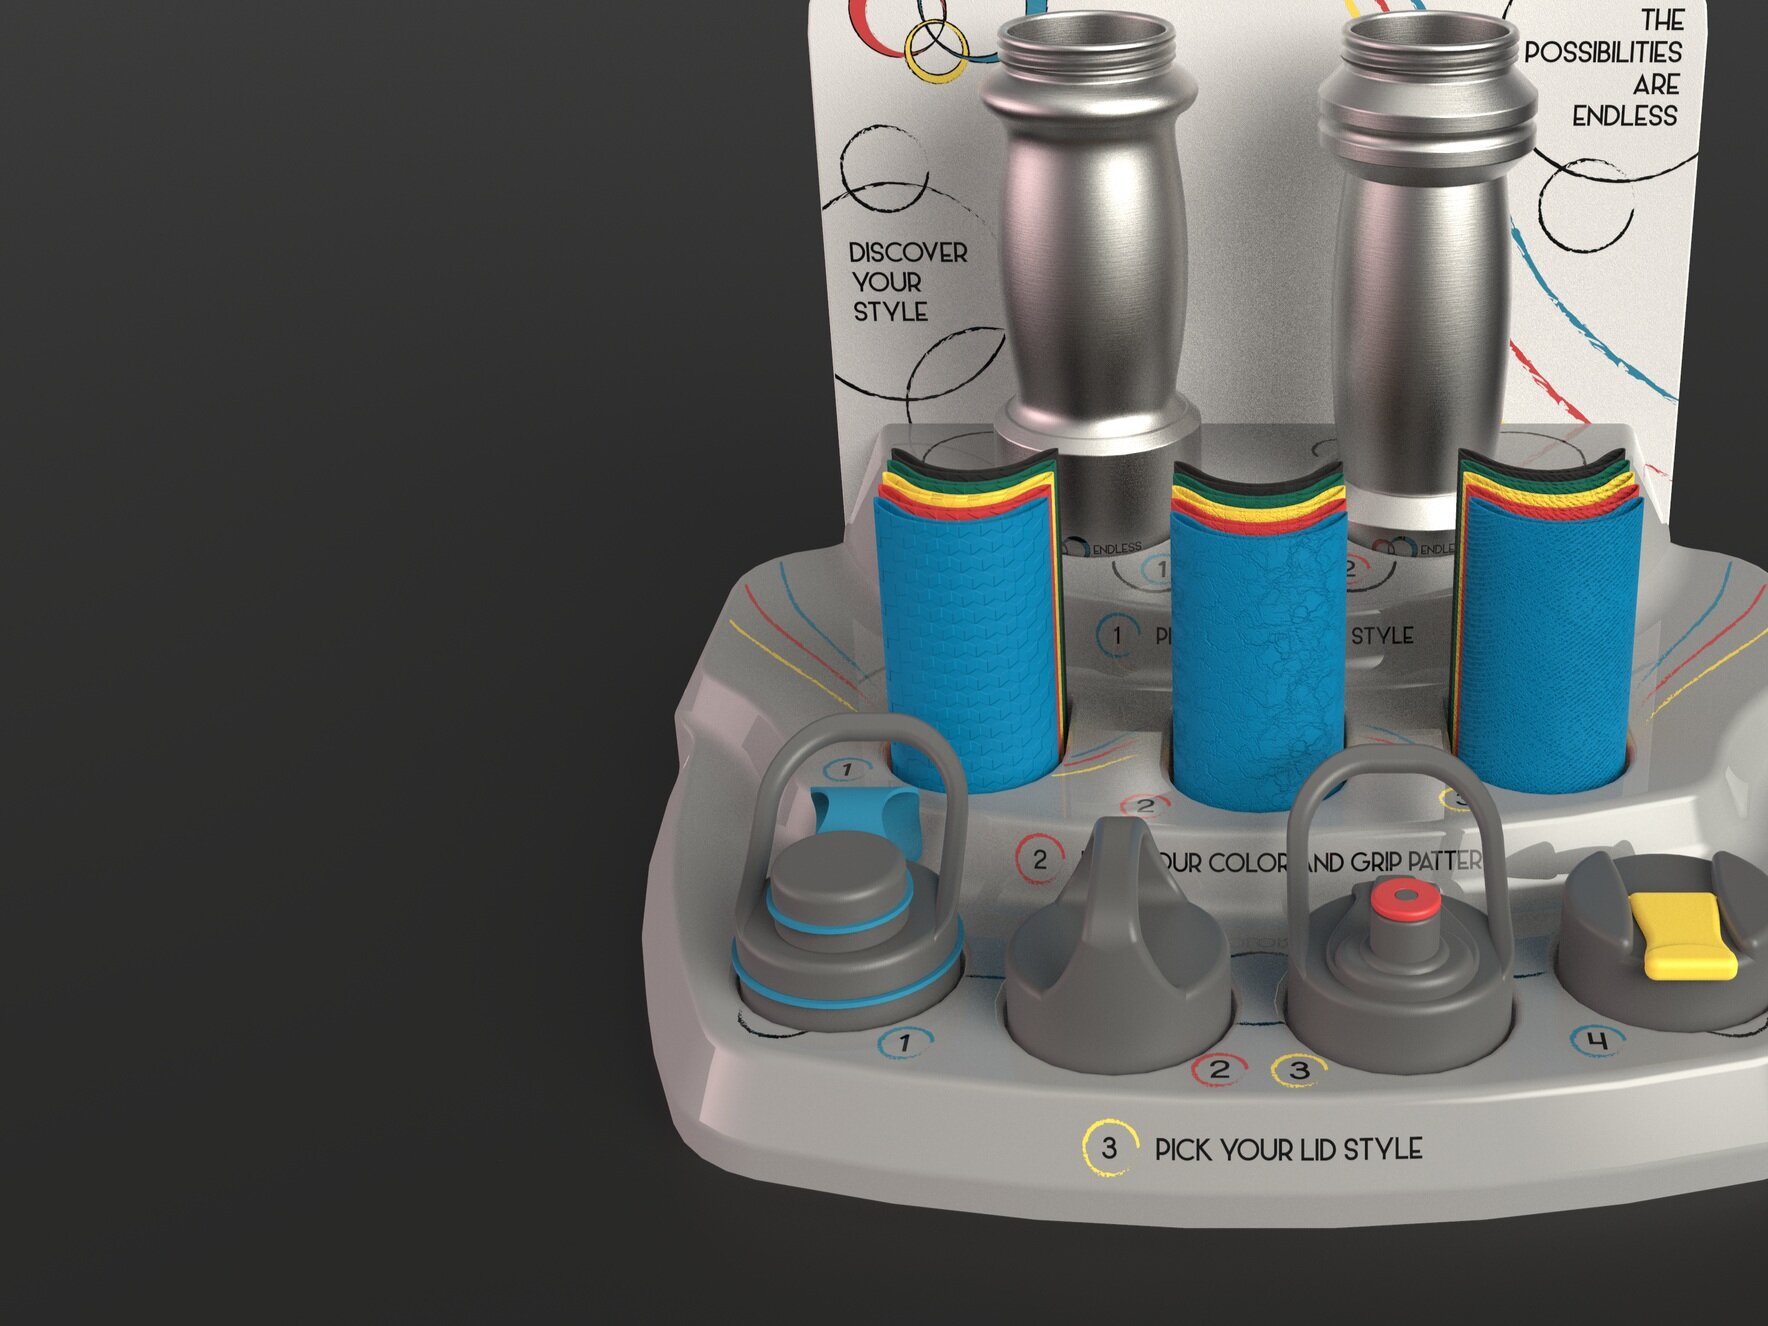
customizable Water bottle
Multiple options for the style of the body, lid, and grip
An array of colors to choose from
Ergonomic grip forms
Family of forms
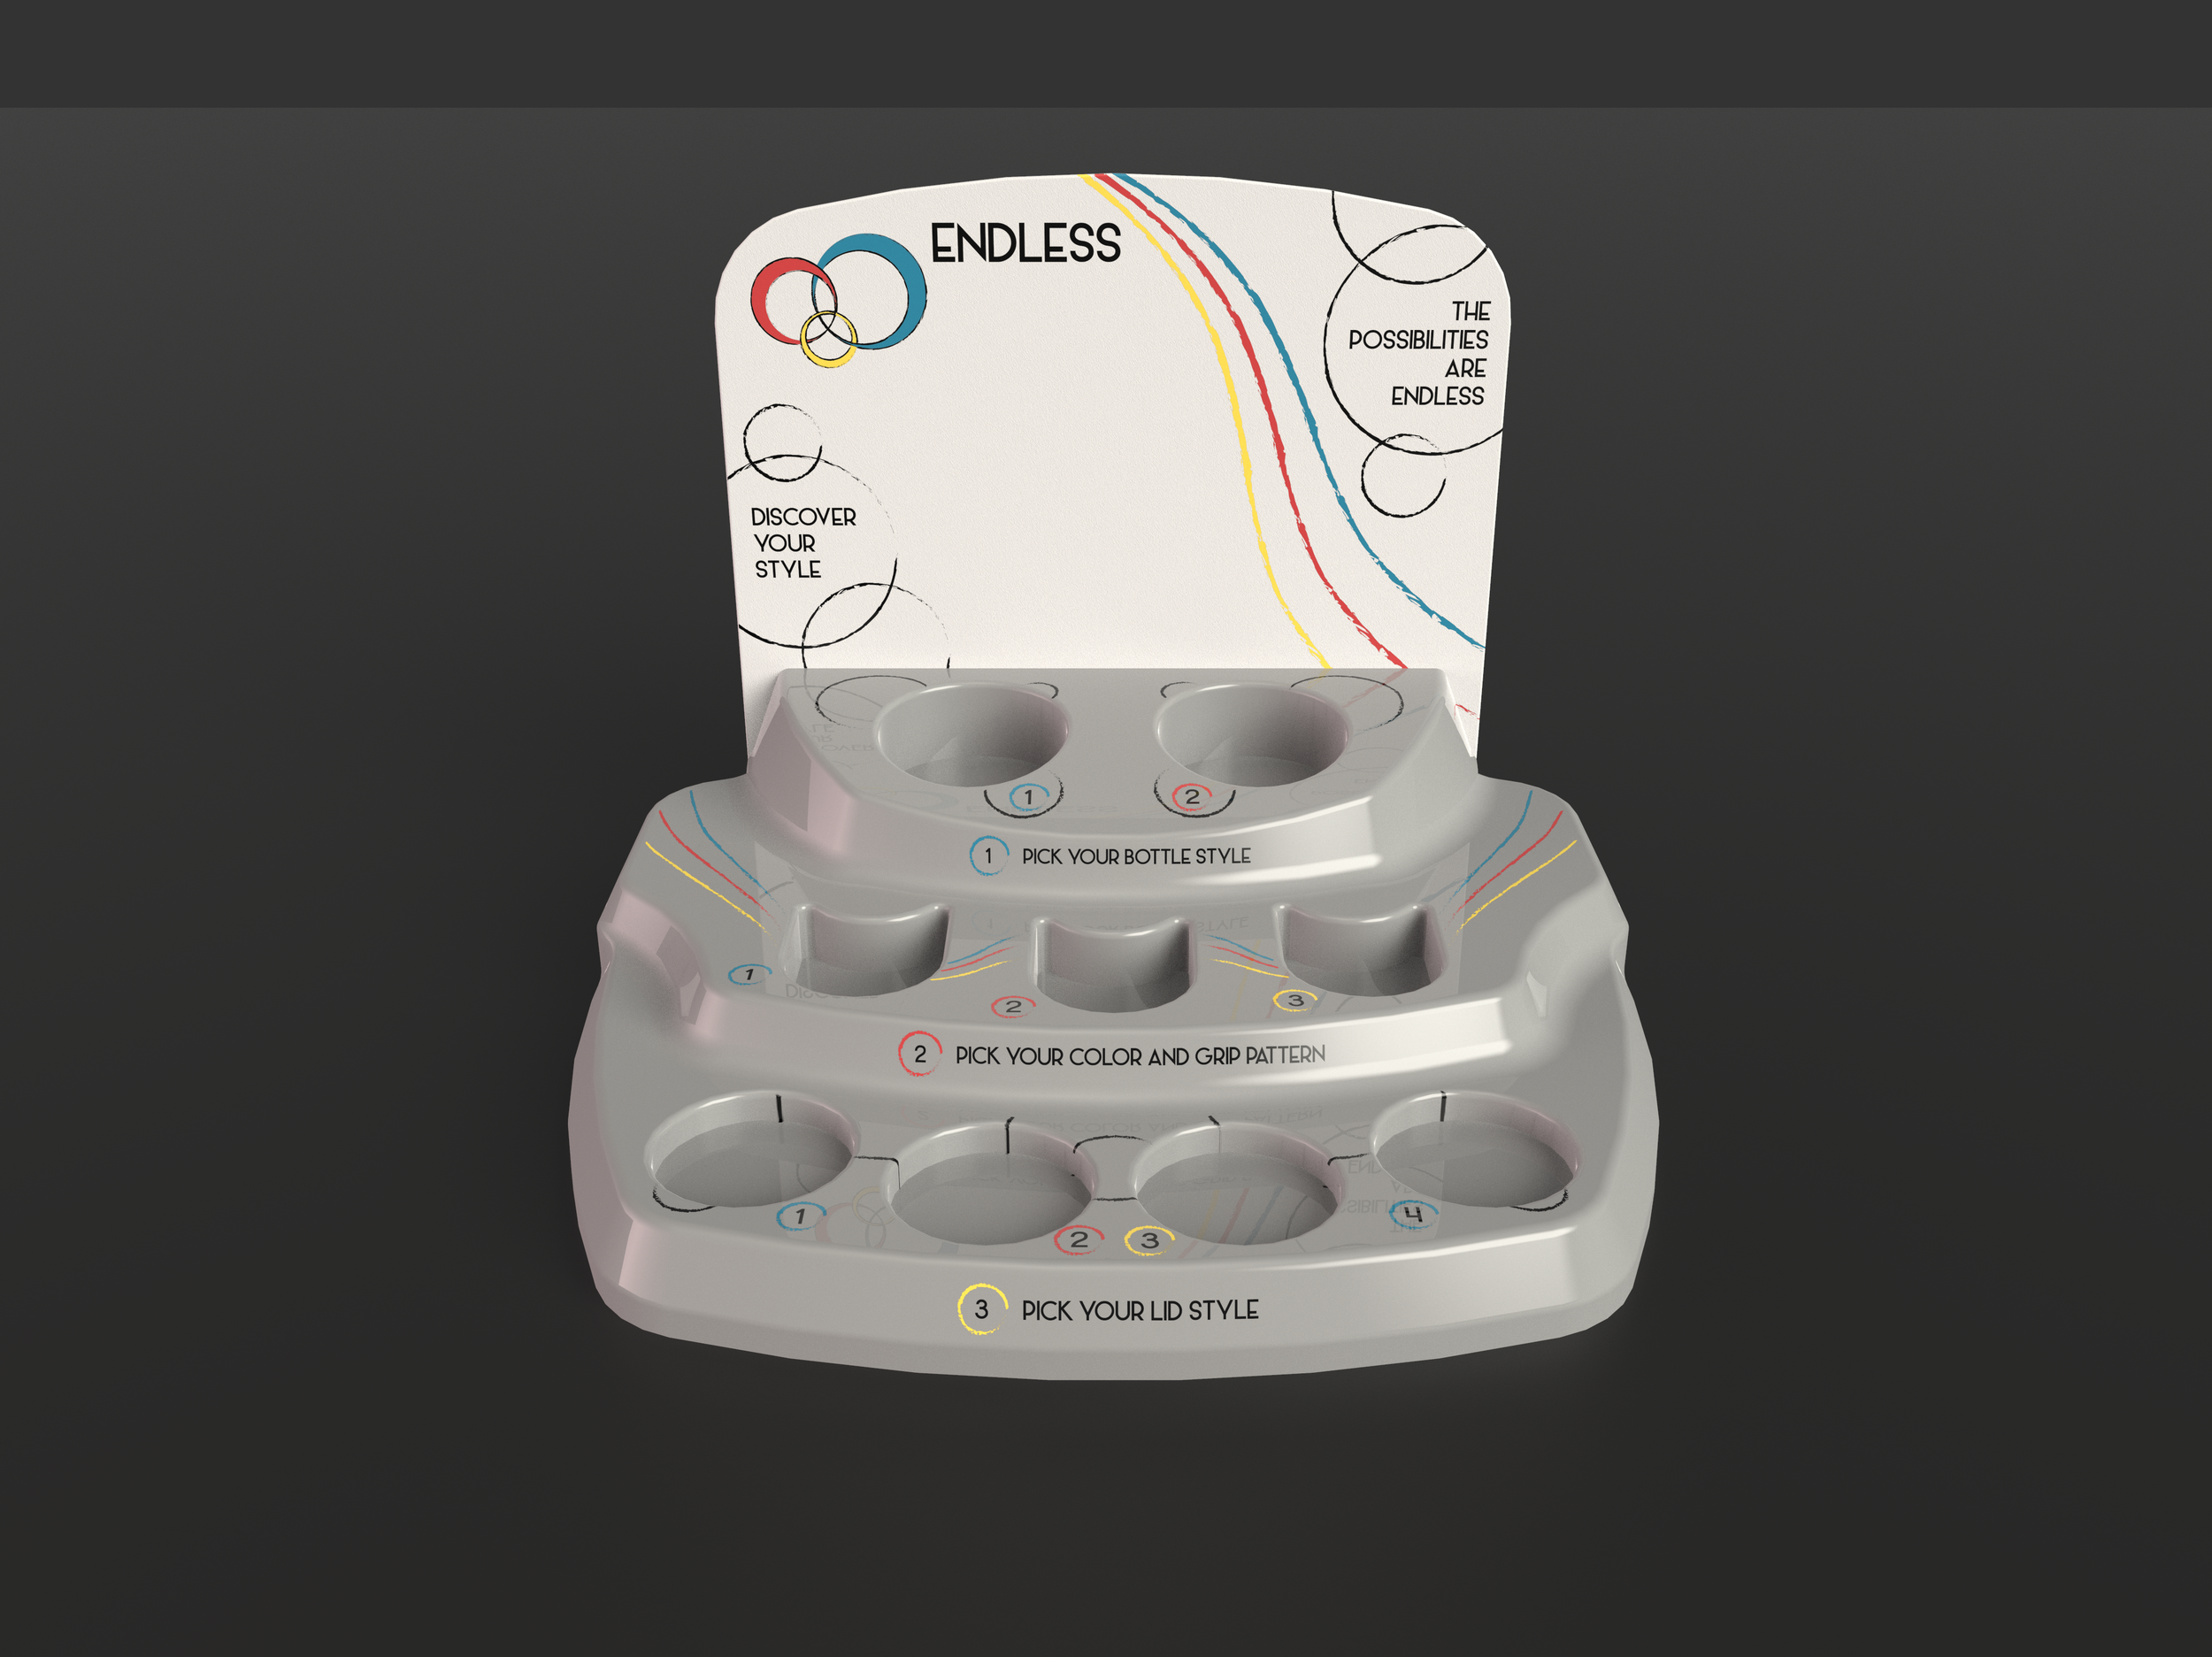
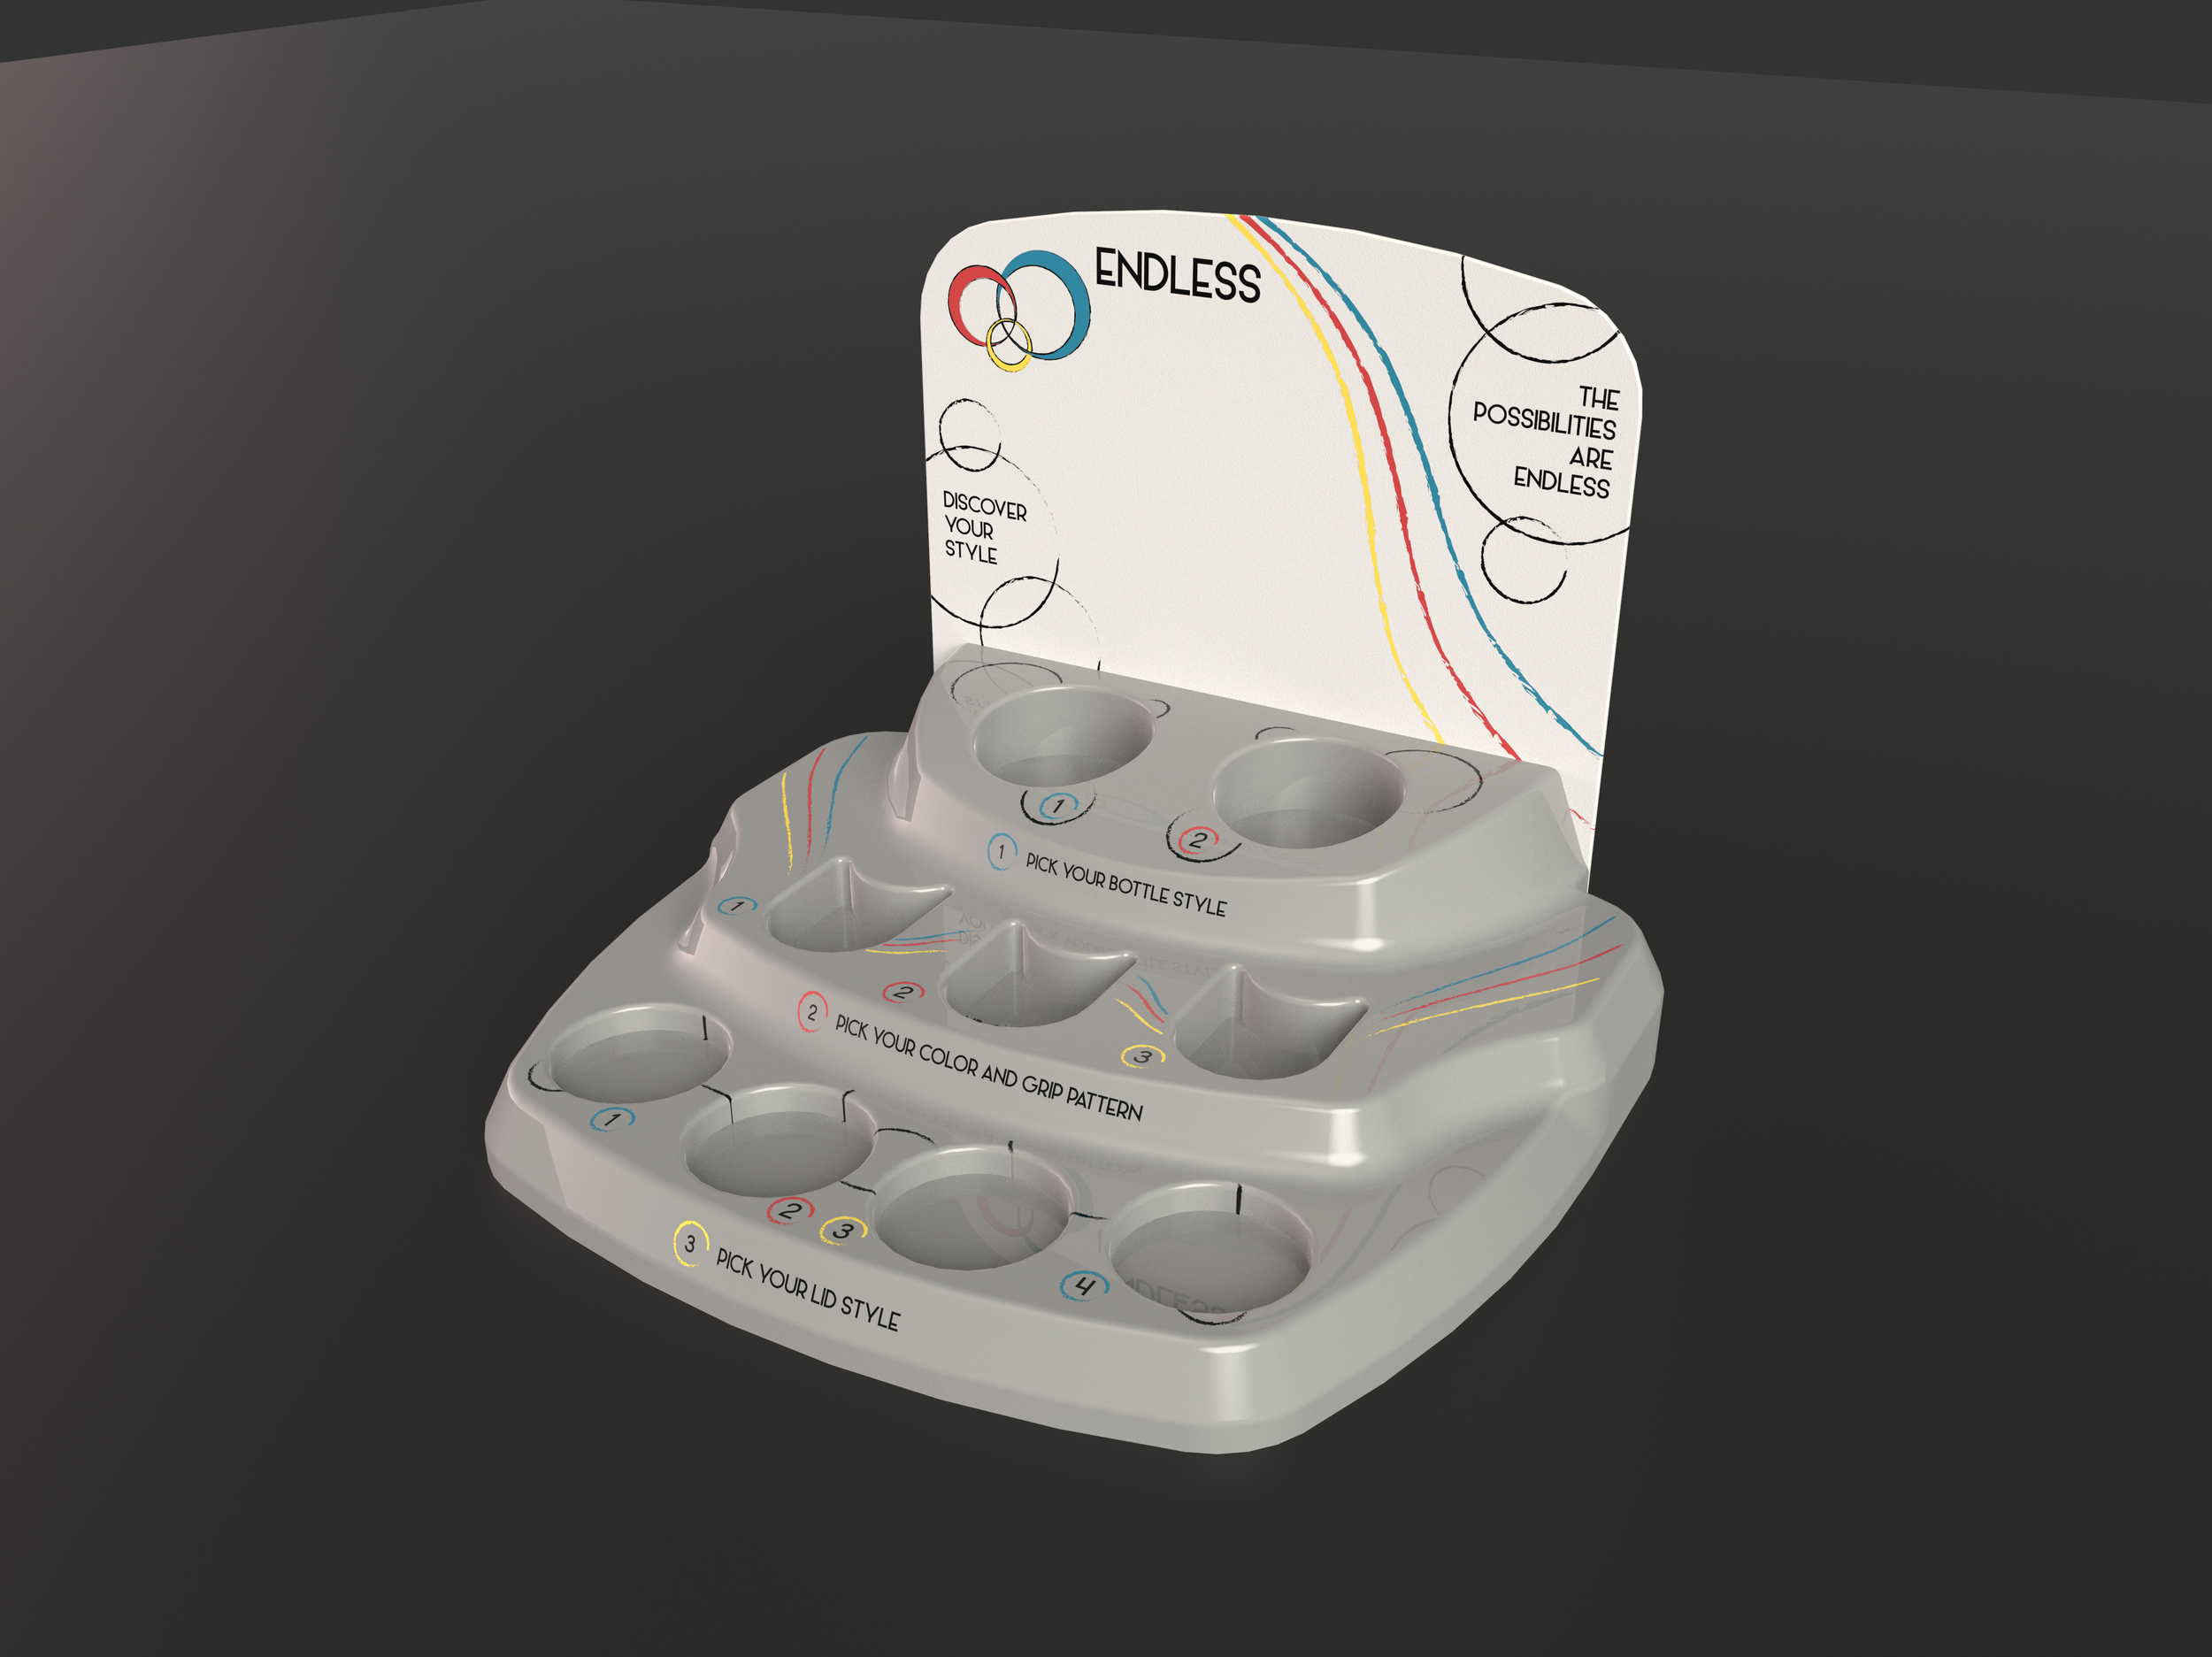
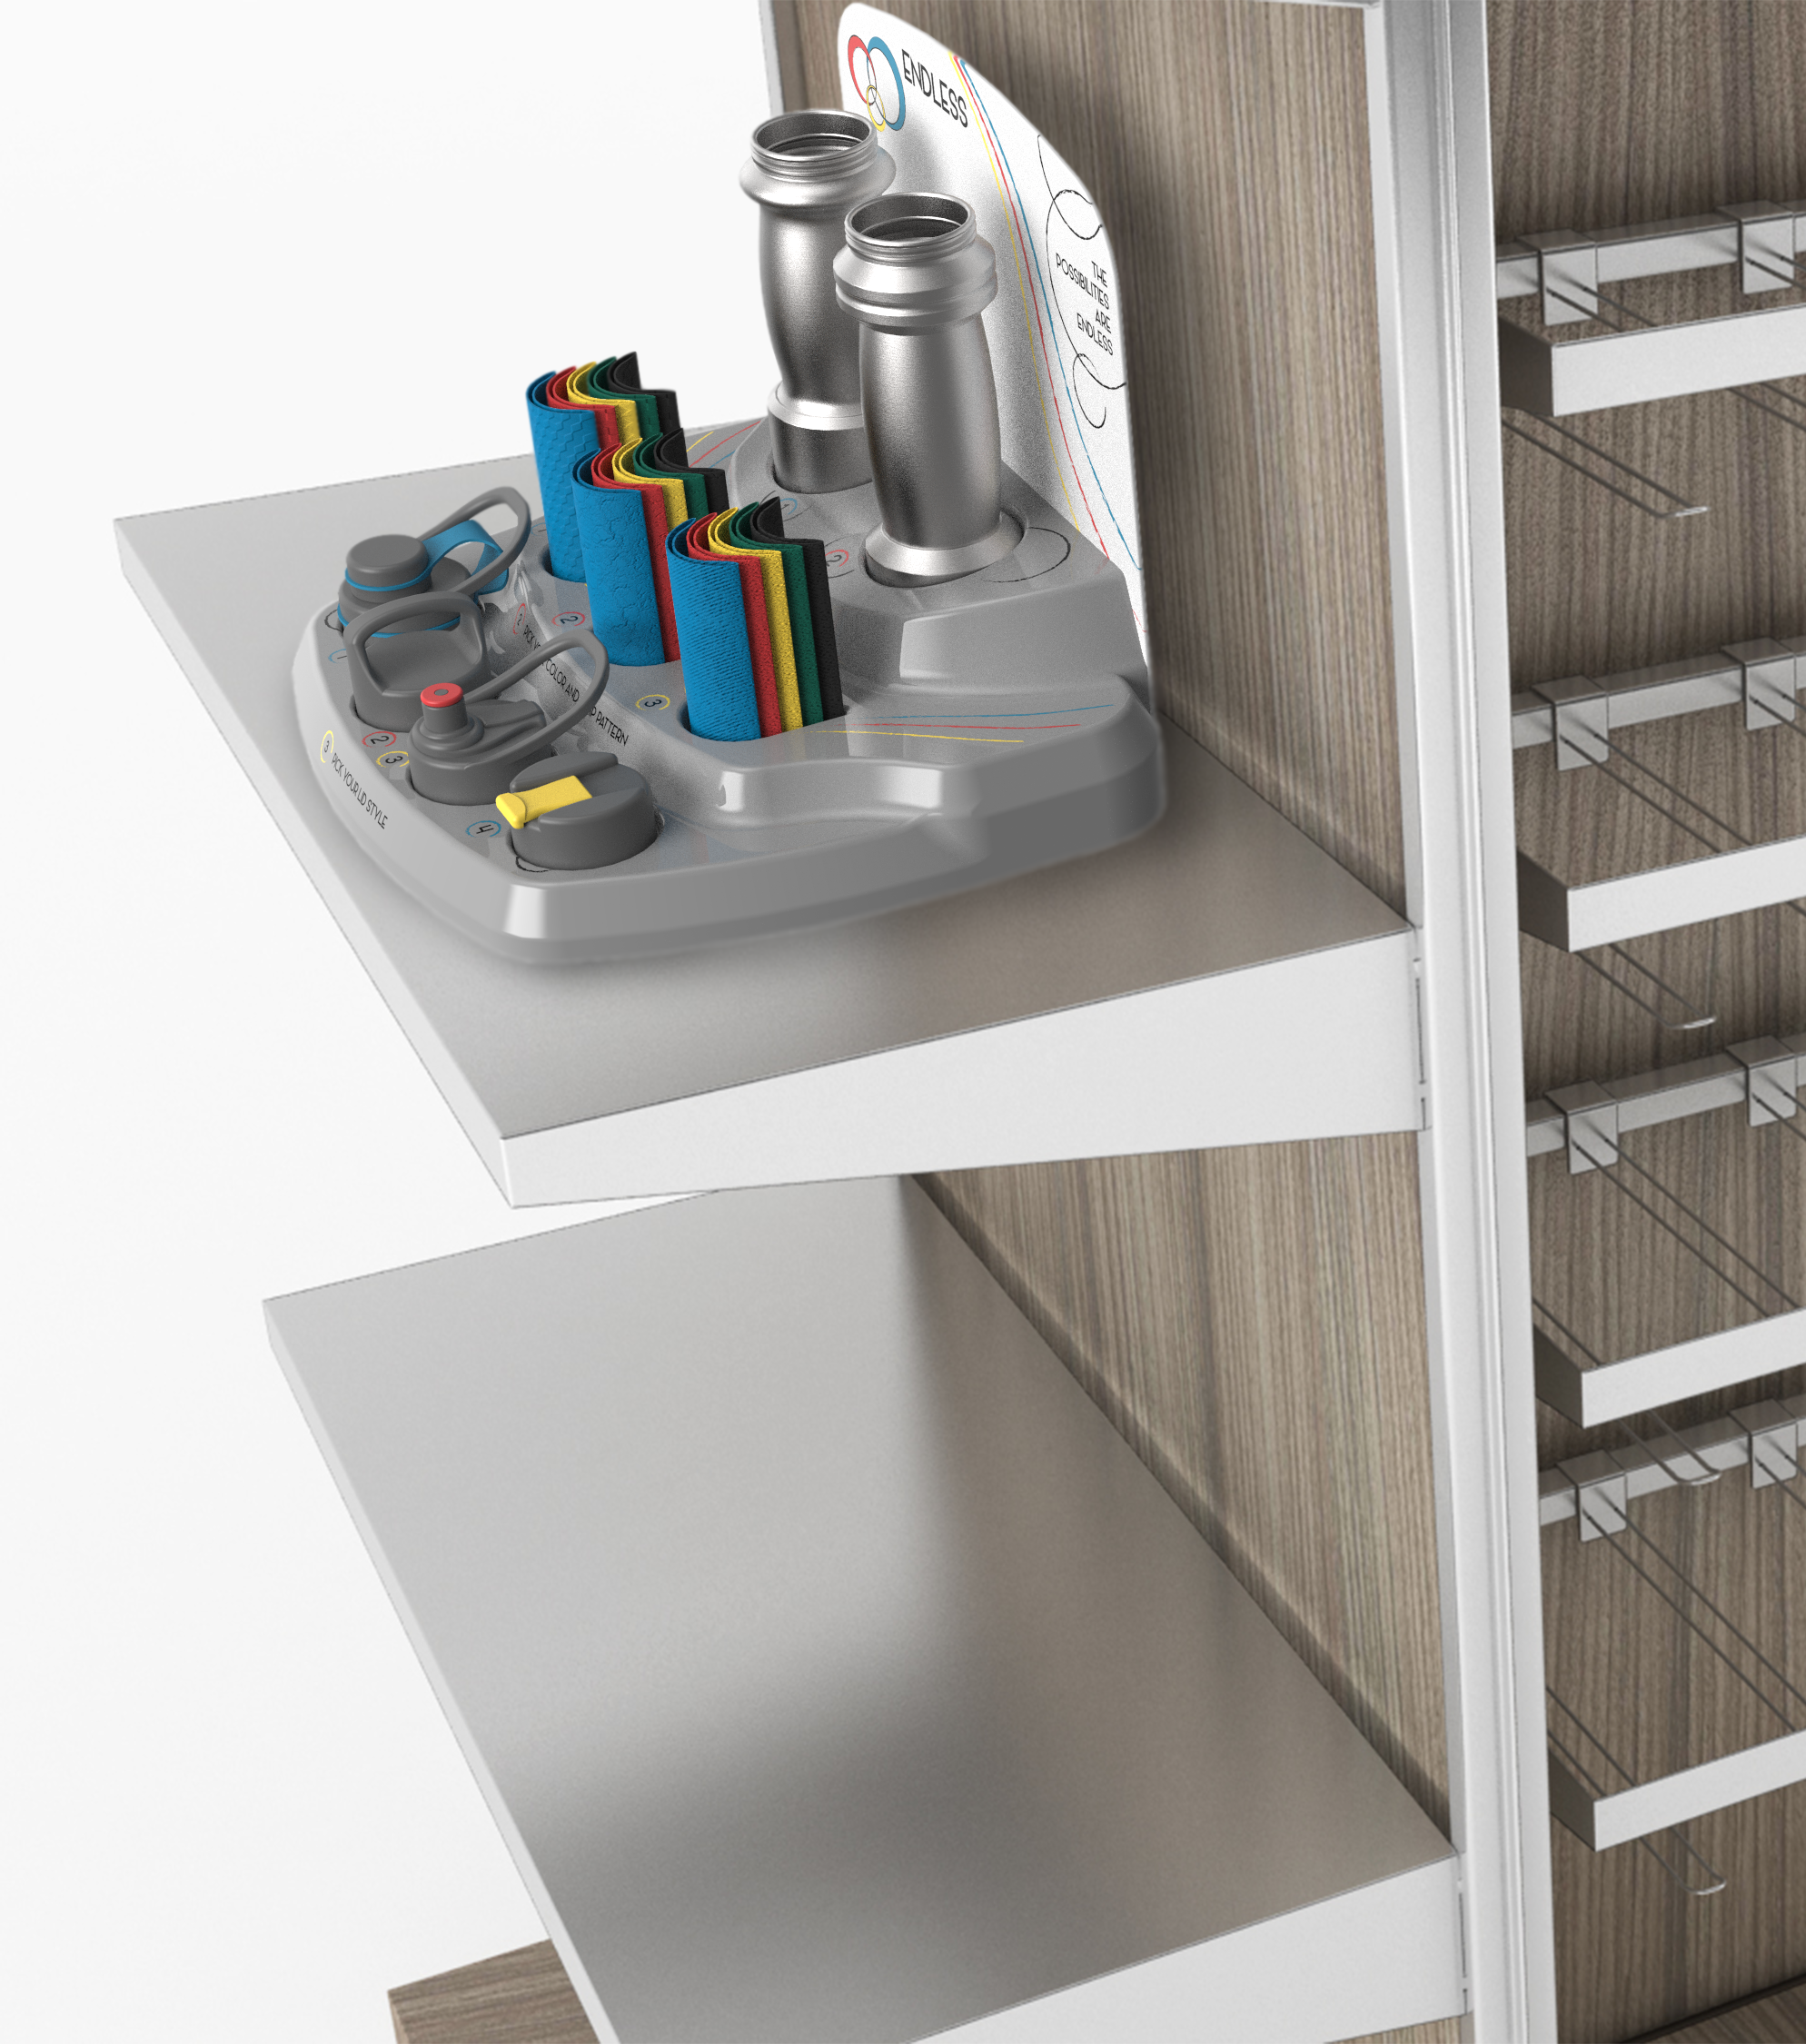
display point-of-sale system
An appealing aesthetic that reflects the bottles
Allows consumer to interact with the product
Easy to follow system of how to customize the bottle


Main Concepts
Each of the 3 main concepts was created around themes that helped shape the forms and aesthetics.
Angular
Concept revolves around the theme of angular forms
Many of the popular brands of reusable water bottles follow a similar more angular form and this concept takes inspiration from those forms
Semi-Organic
Concept revolves around the theme of semi-organic forms
Stuck to a more unique form while keeping the same feel of the popular HydroFlask bottles
Curve of the bottle also allows the user to grip the bottle better
Organic
Concept revolves around the theme of organic forms
Wanted to go out of the box with this concept and see what could happen
Looked at other grip forms and the way some grips mold around the fingers and got inspiration
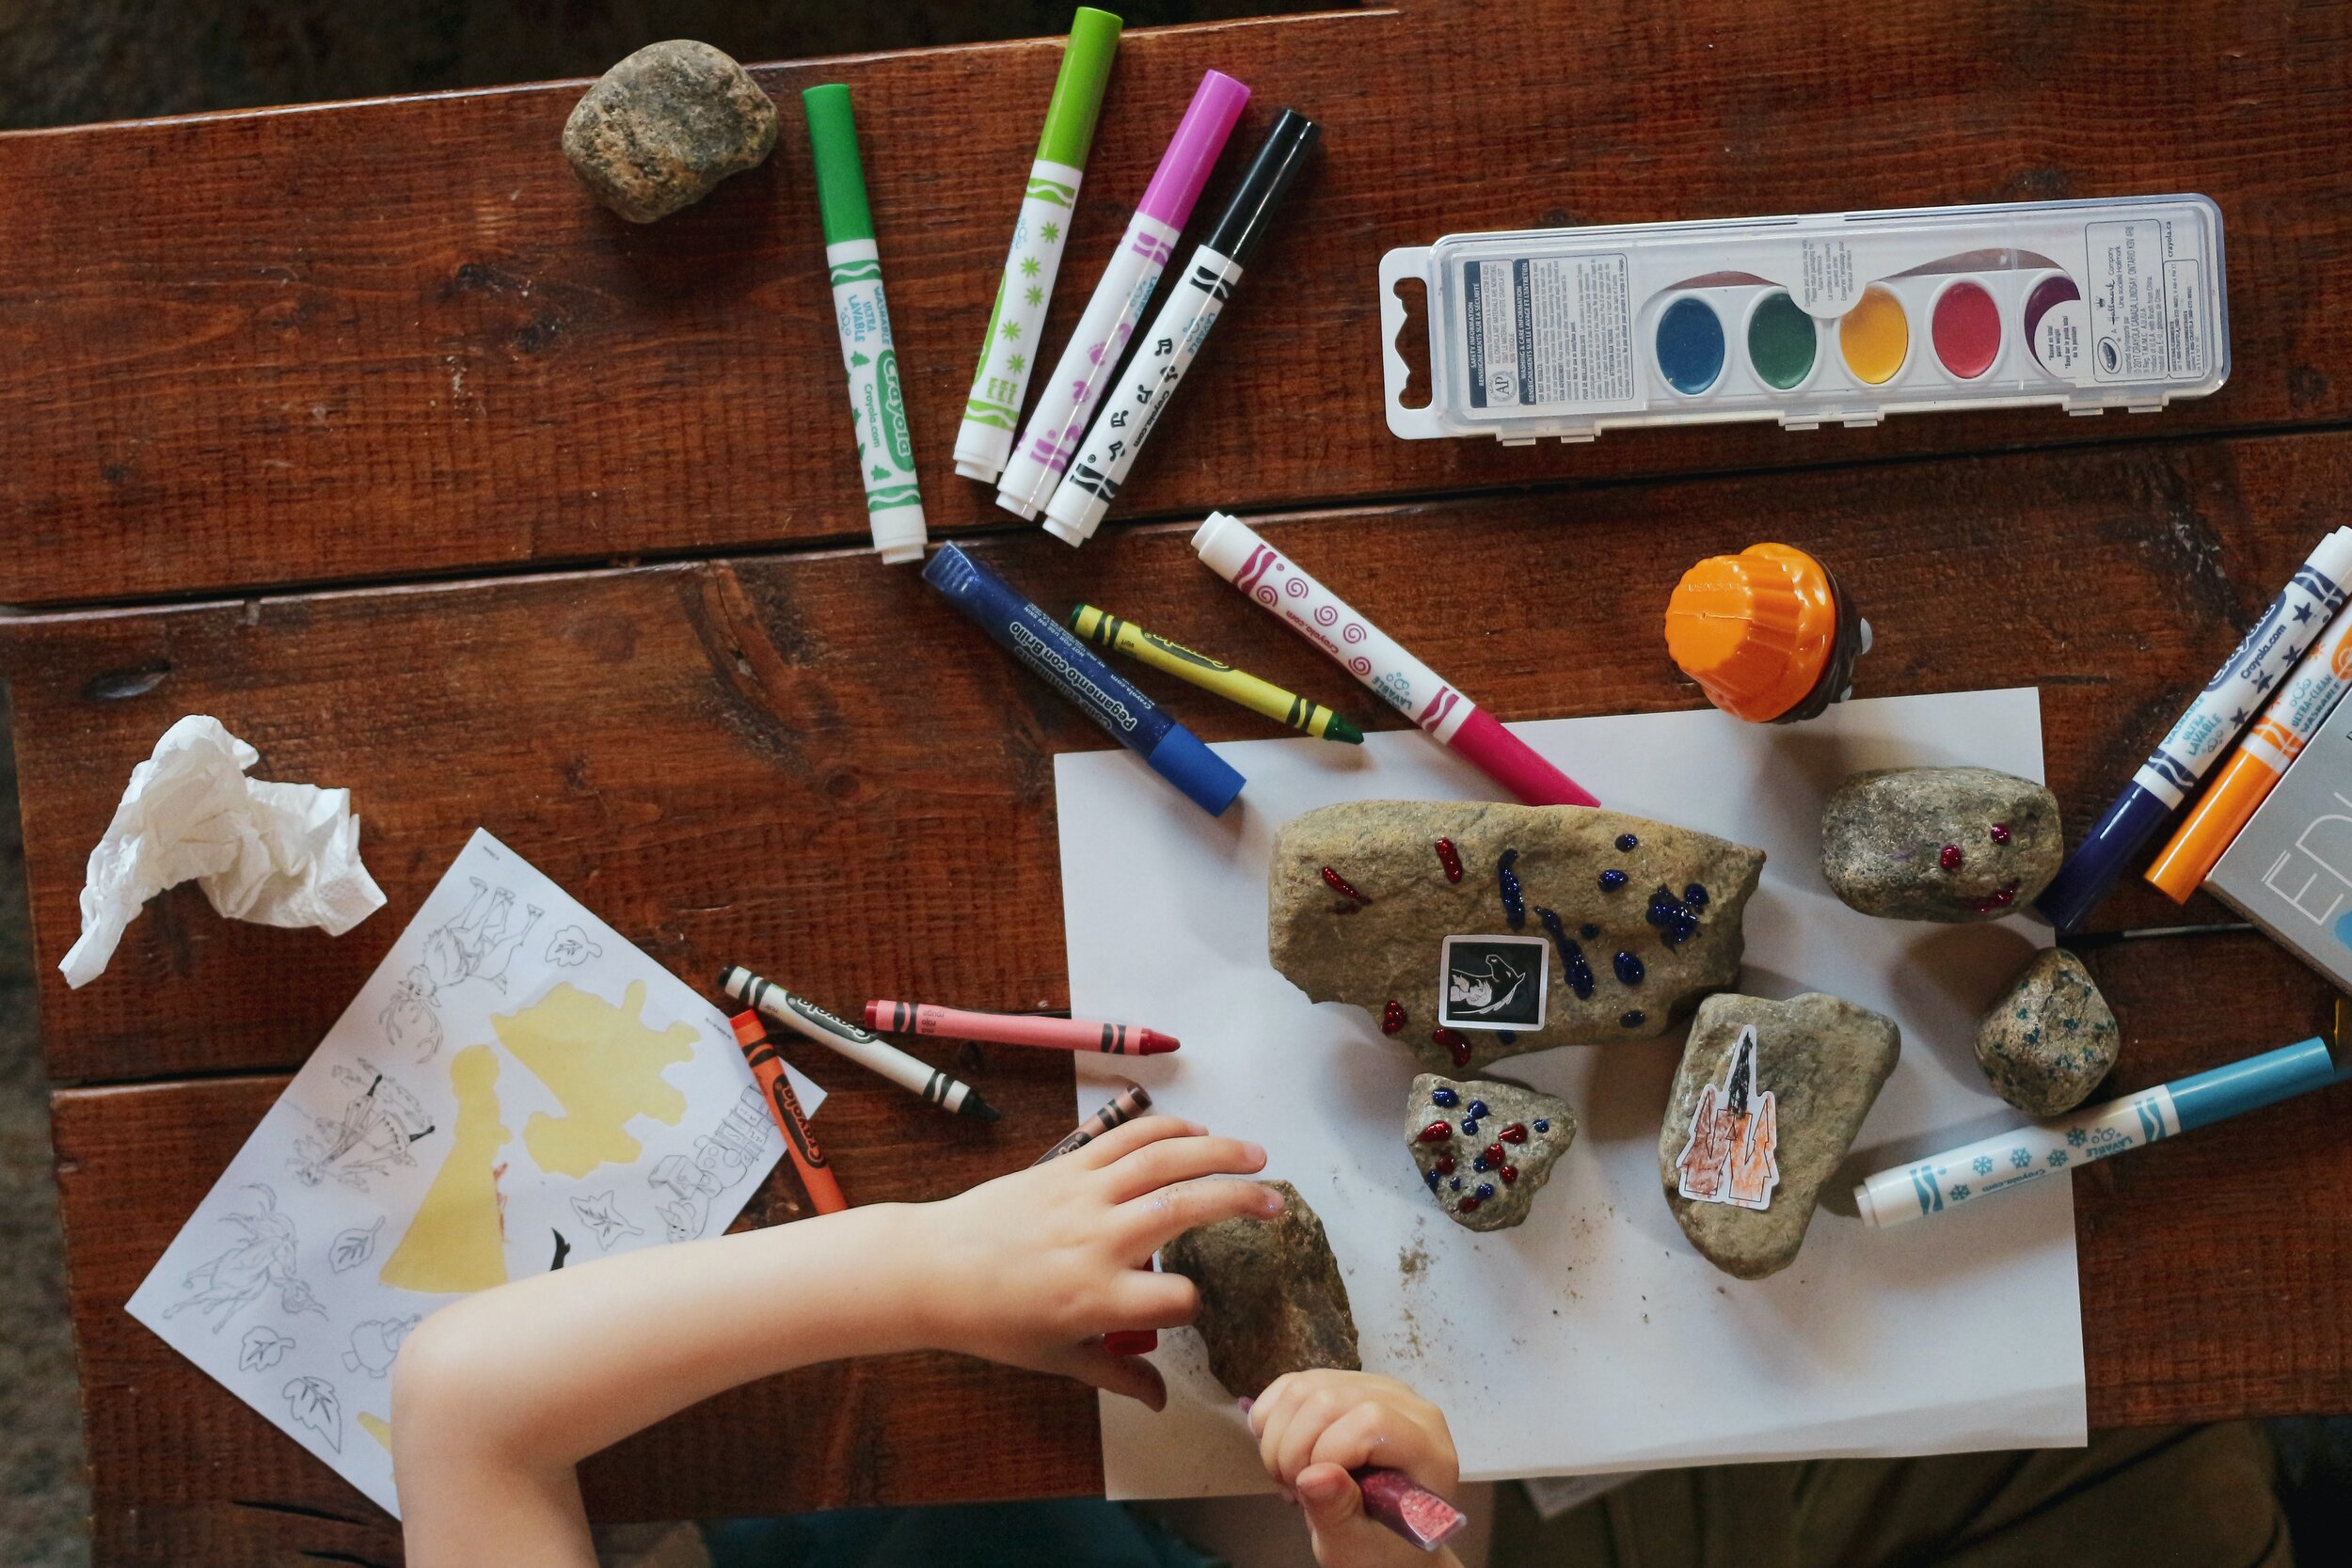
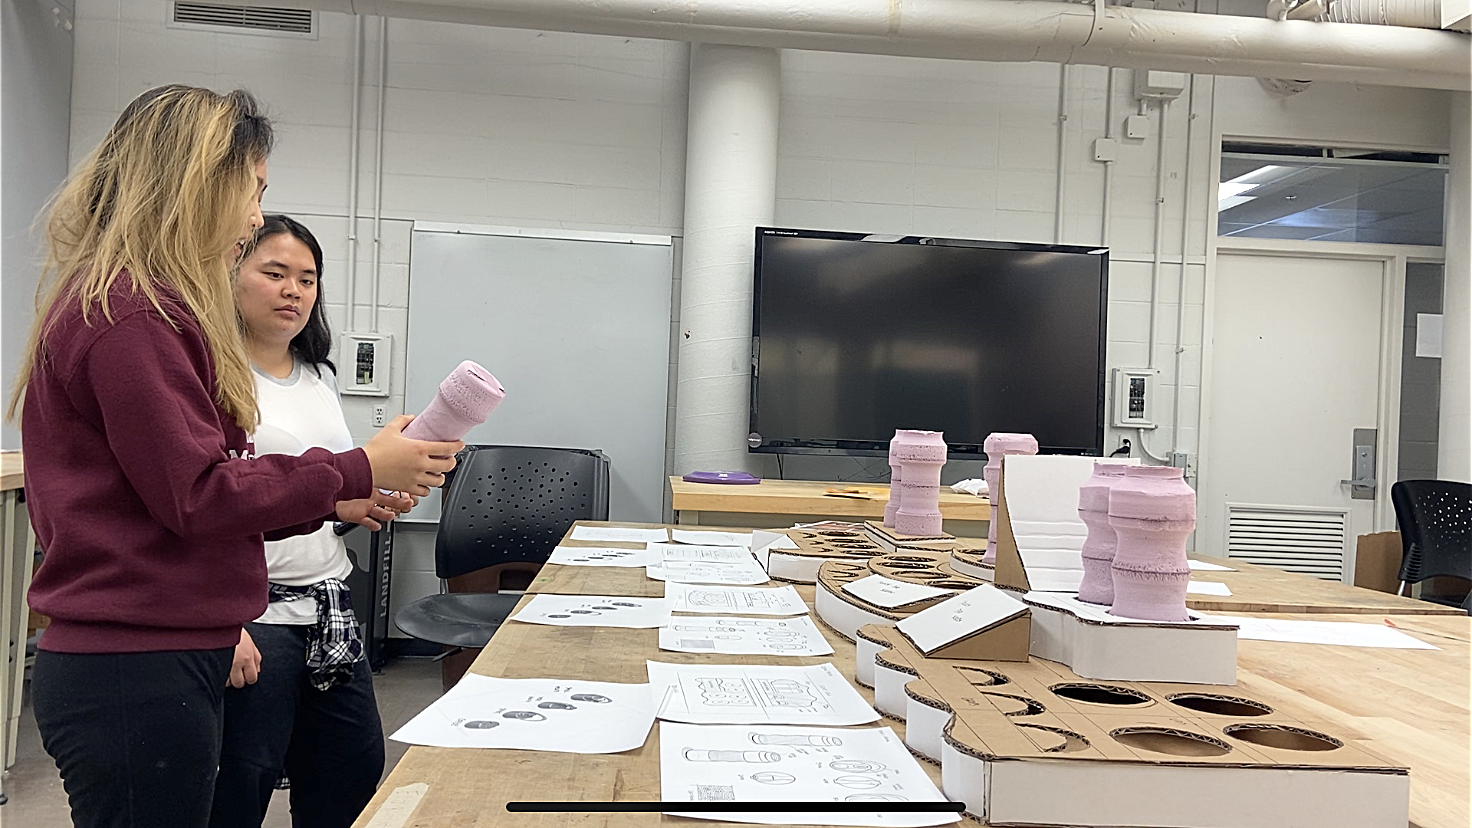
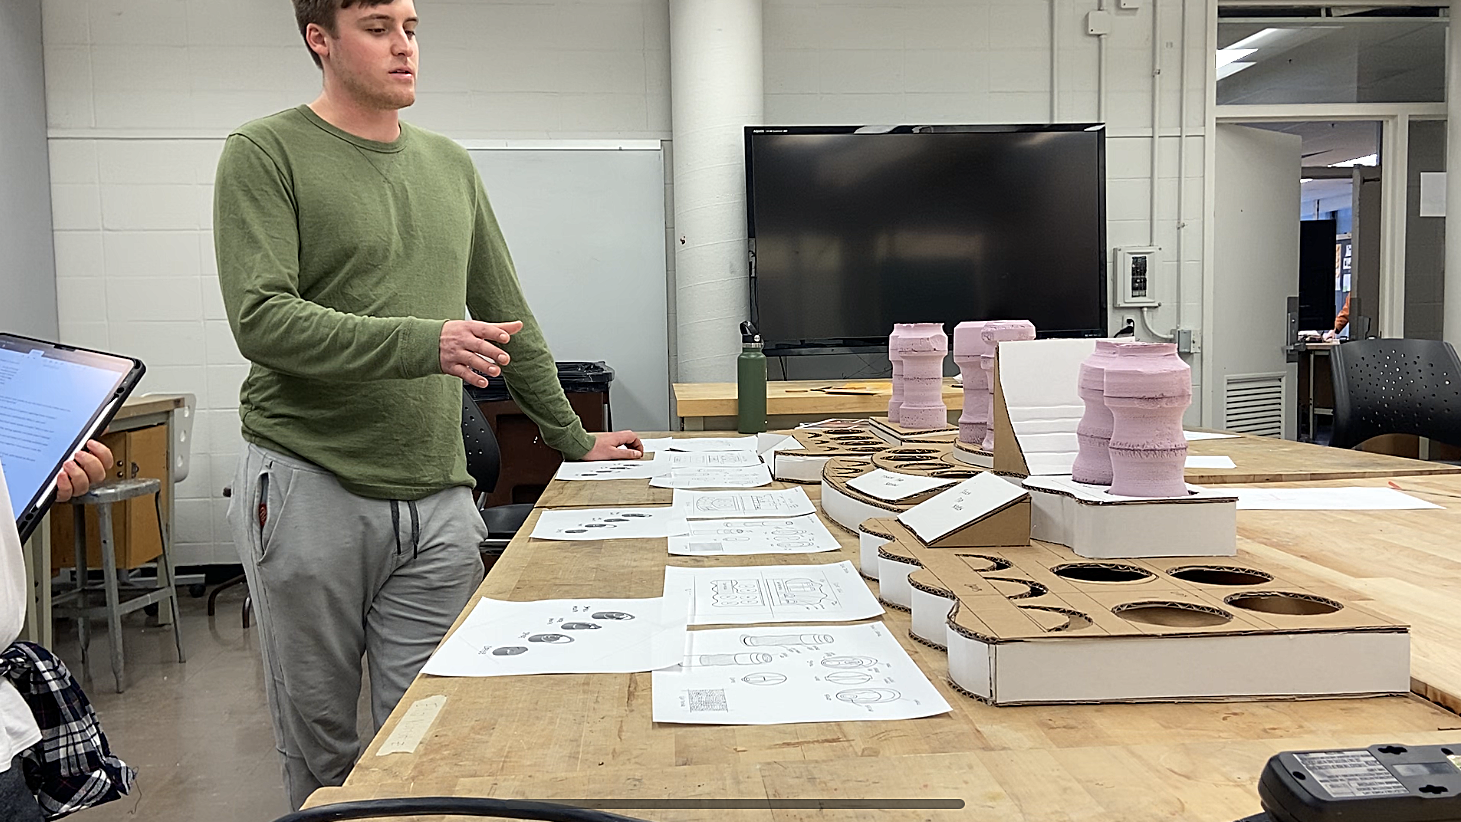
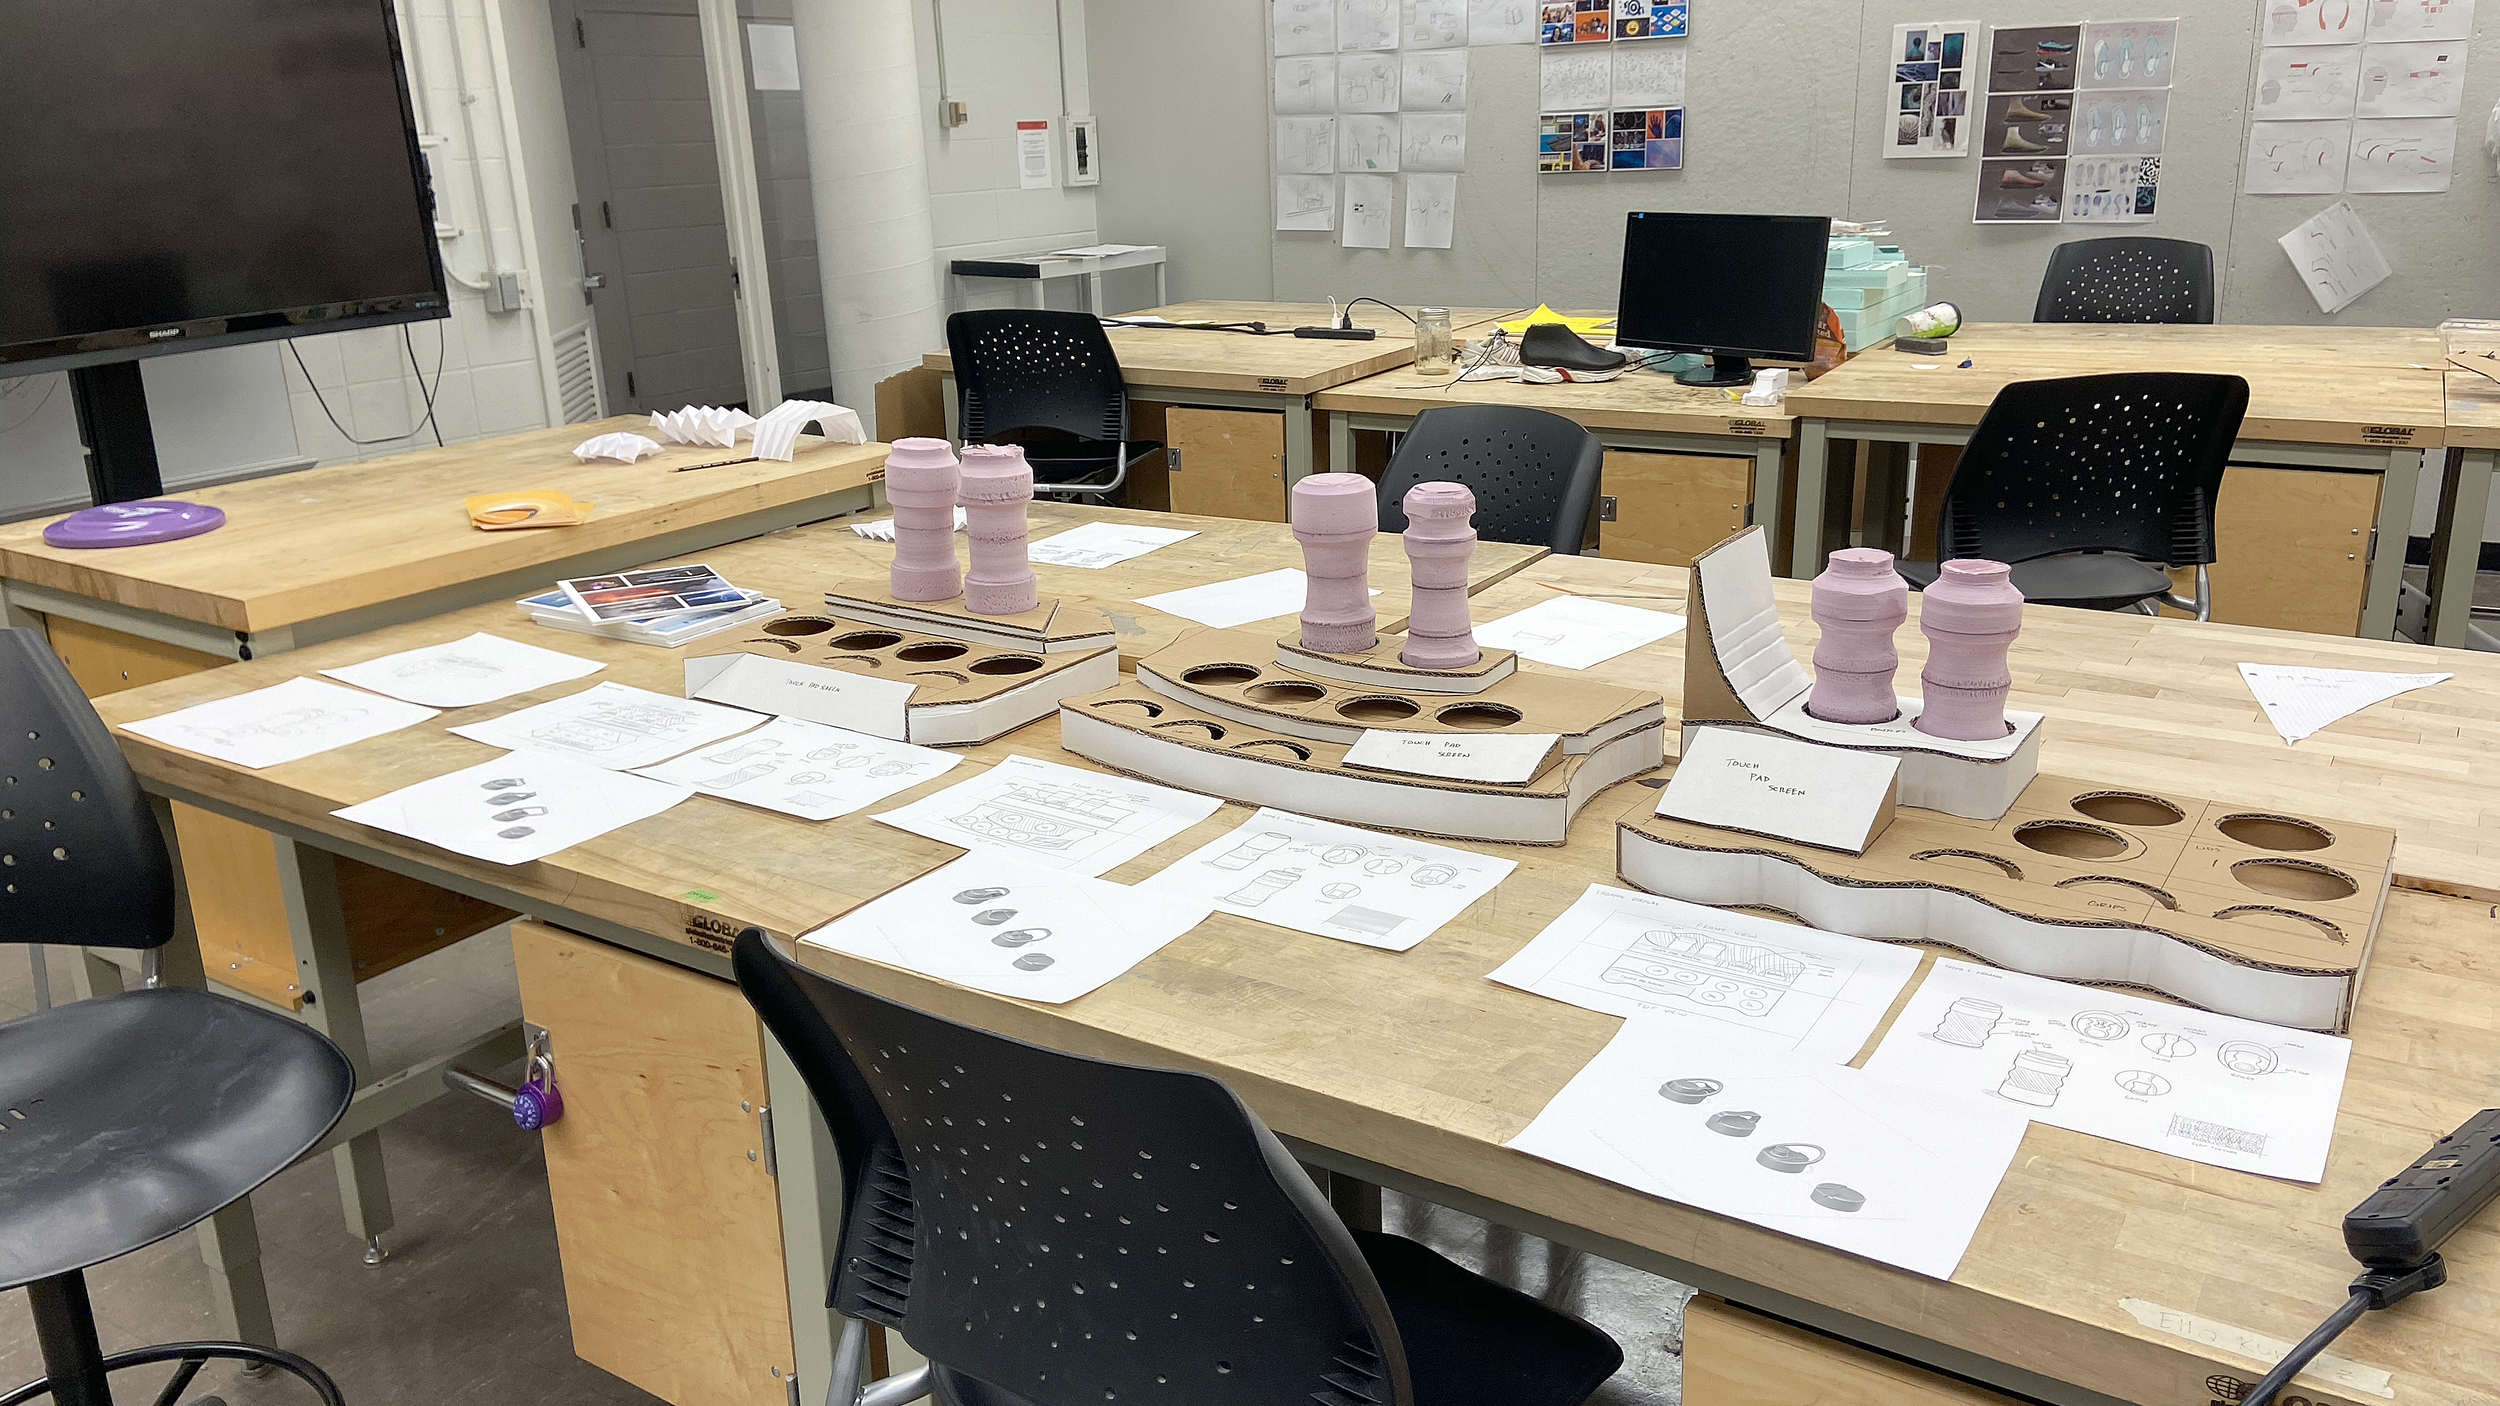
Models
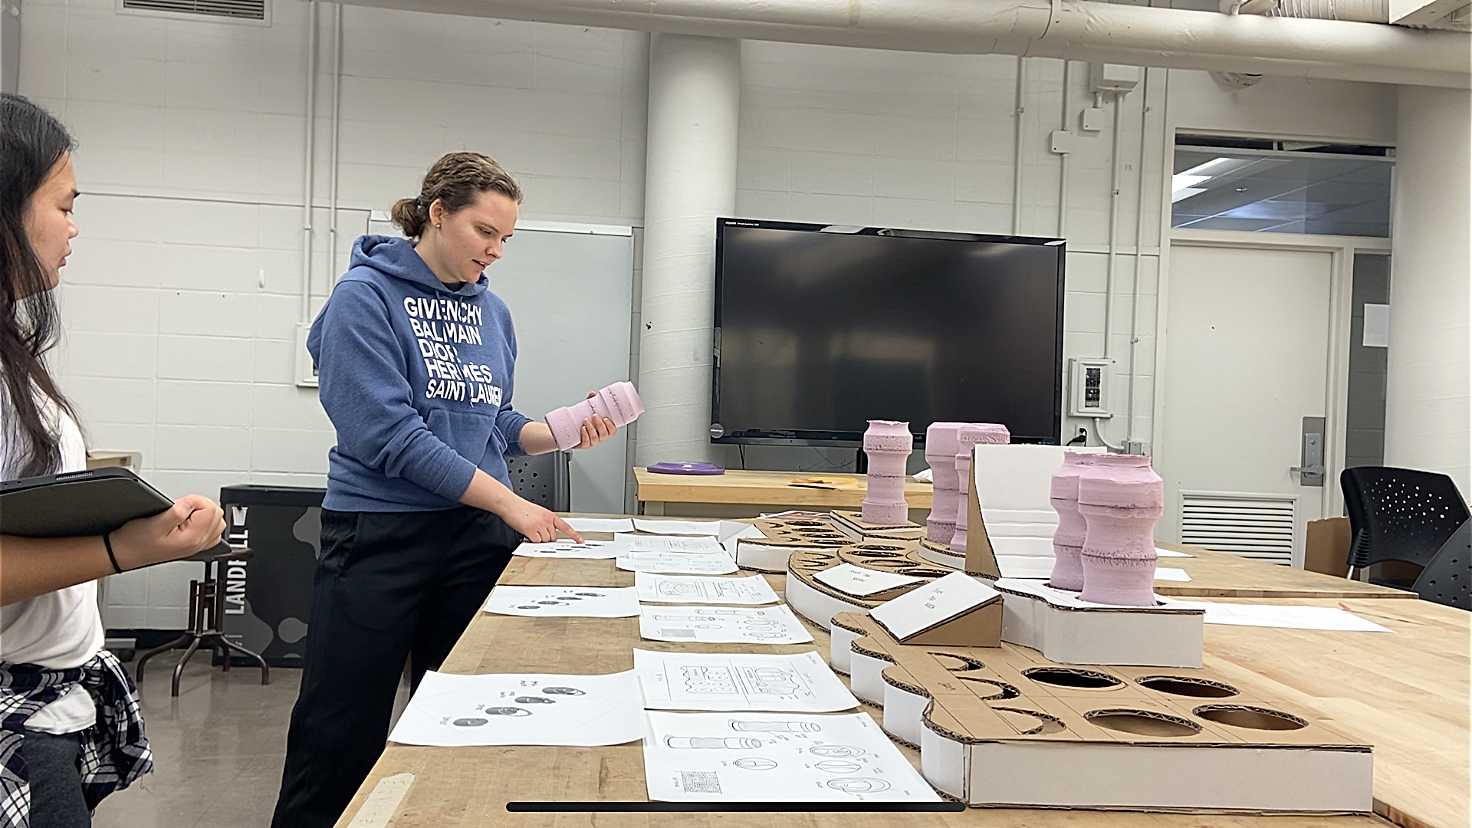
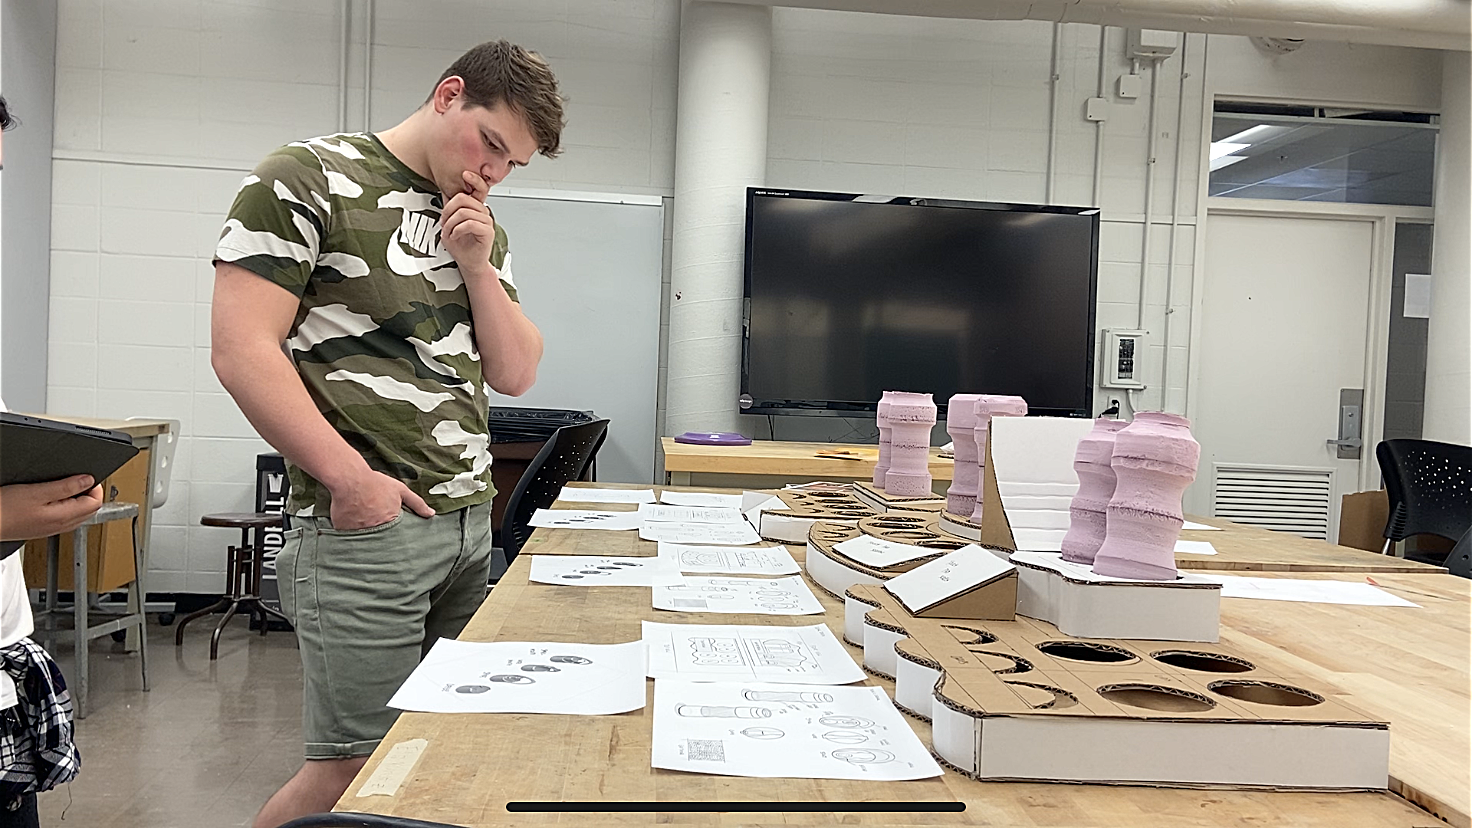
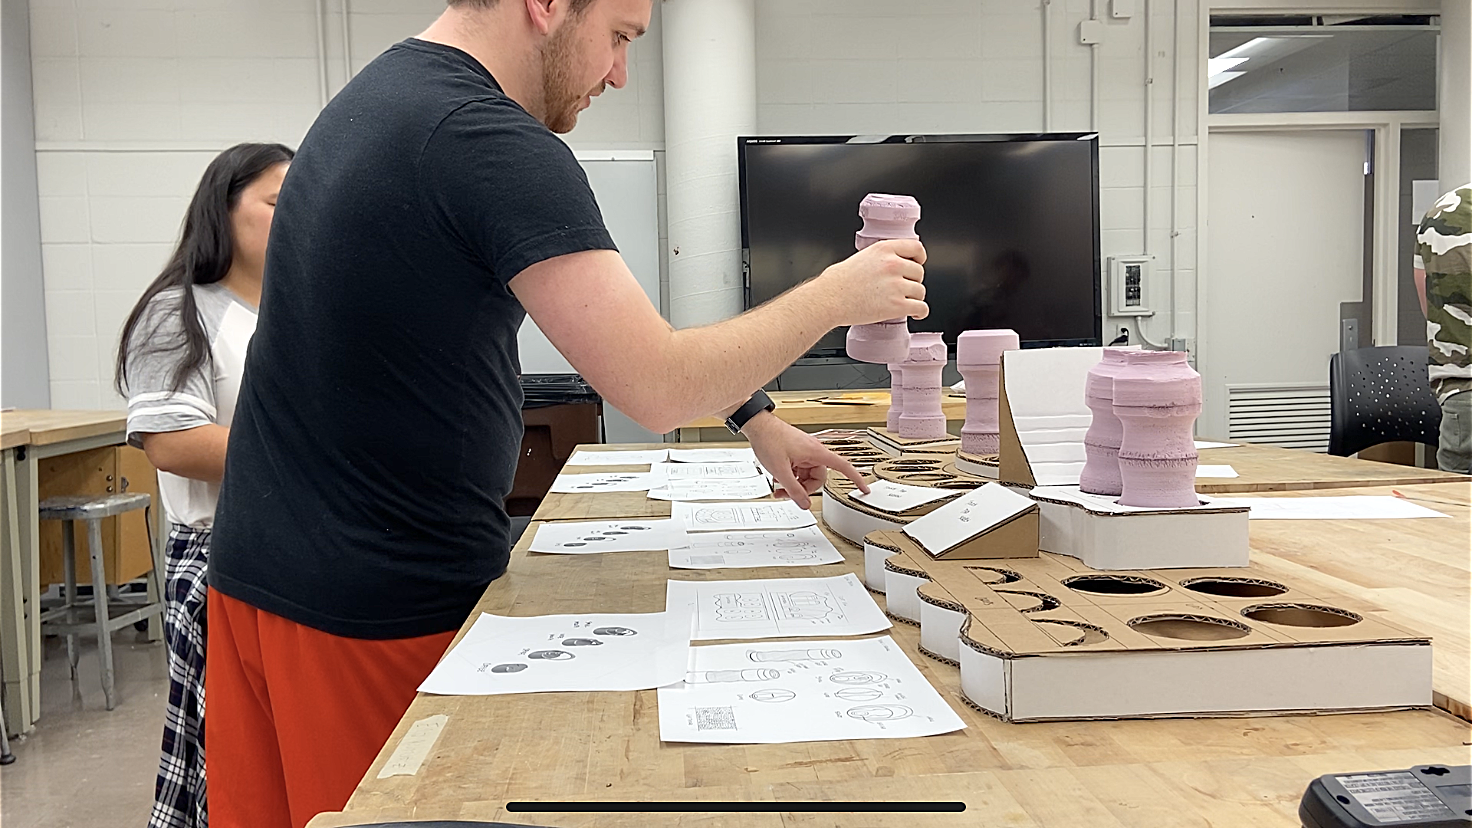
Quick prototypes made from pink foam and cardboard.
The bottles were milled on a wood lathe to get the right cylindrical look. The display was measured, cut, and hot glued together.
Physically making the models allowed for me to figure out the sizing, placing, and proportions that would fit the best.
Since the lids were a little too complicated to quickly prototype, they were modeled in CAD to work out the sizing and aesthetics.


validation
To get feedback for my concepts, I set up my physical models and had my sketches and CAD models out to look at as I interviewed a handful of people. Below are my findings from the interviews:
Organic
add an additional tier
making everything symmetrical
give the bottles one single hump like an egg
make sure everything on the display is intentional
tone down the free form
Angular
incorporate the same angles throughout the display
soften and flatten sharp corners
interchange the pieces between the concepts
add taper to make it look sleeker and less boxy
Semi-Organic
centering everything
incorporating the touch screen pad into the display
differentiate the bottles from the angular bottles
make the curves convex instead of concave
make sure space is used intentionally


what I learned and my final direction
Following the feedback and the findings that I got from my interviews, I came up with my final direction and final criteria.
Criteria and Direction
centered and symmetrical display
defined tiers that separate the pieces
smaller display closer to the size of the angular concept
similar curves or angles throughout the entire design
tapers and tilts to display so that it isn’t boxy looking
make the bottles convex instead of concave
make the bottle styles more different
combine ideas from each of the concepts
have an array of colors to choose from
Final Concept
This final concept combines the best features from all of the initial concepts into one final idea.
It eliminates the touch-pad screen so that the physical customization process takes precedent in the design and is the main thing that consumers see.
The bottles’ styles are different enough to express the consumers’ different personalities and the various colors and grip textures allow for an array of different combinations.


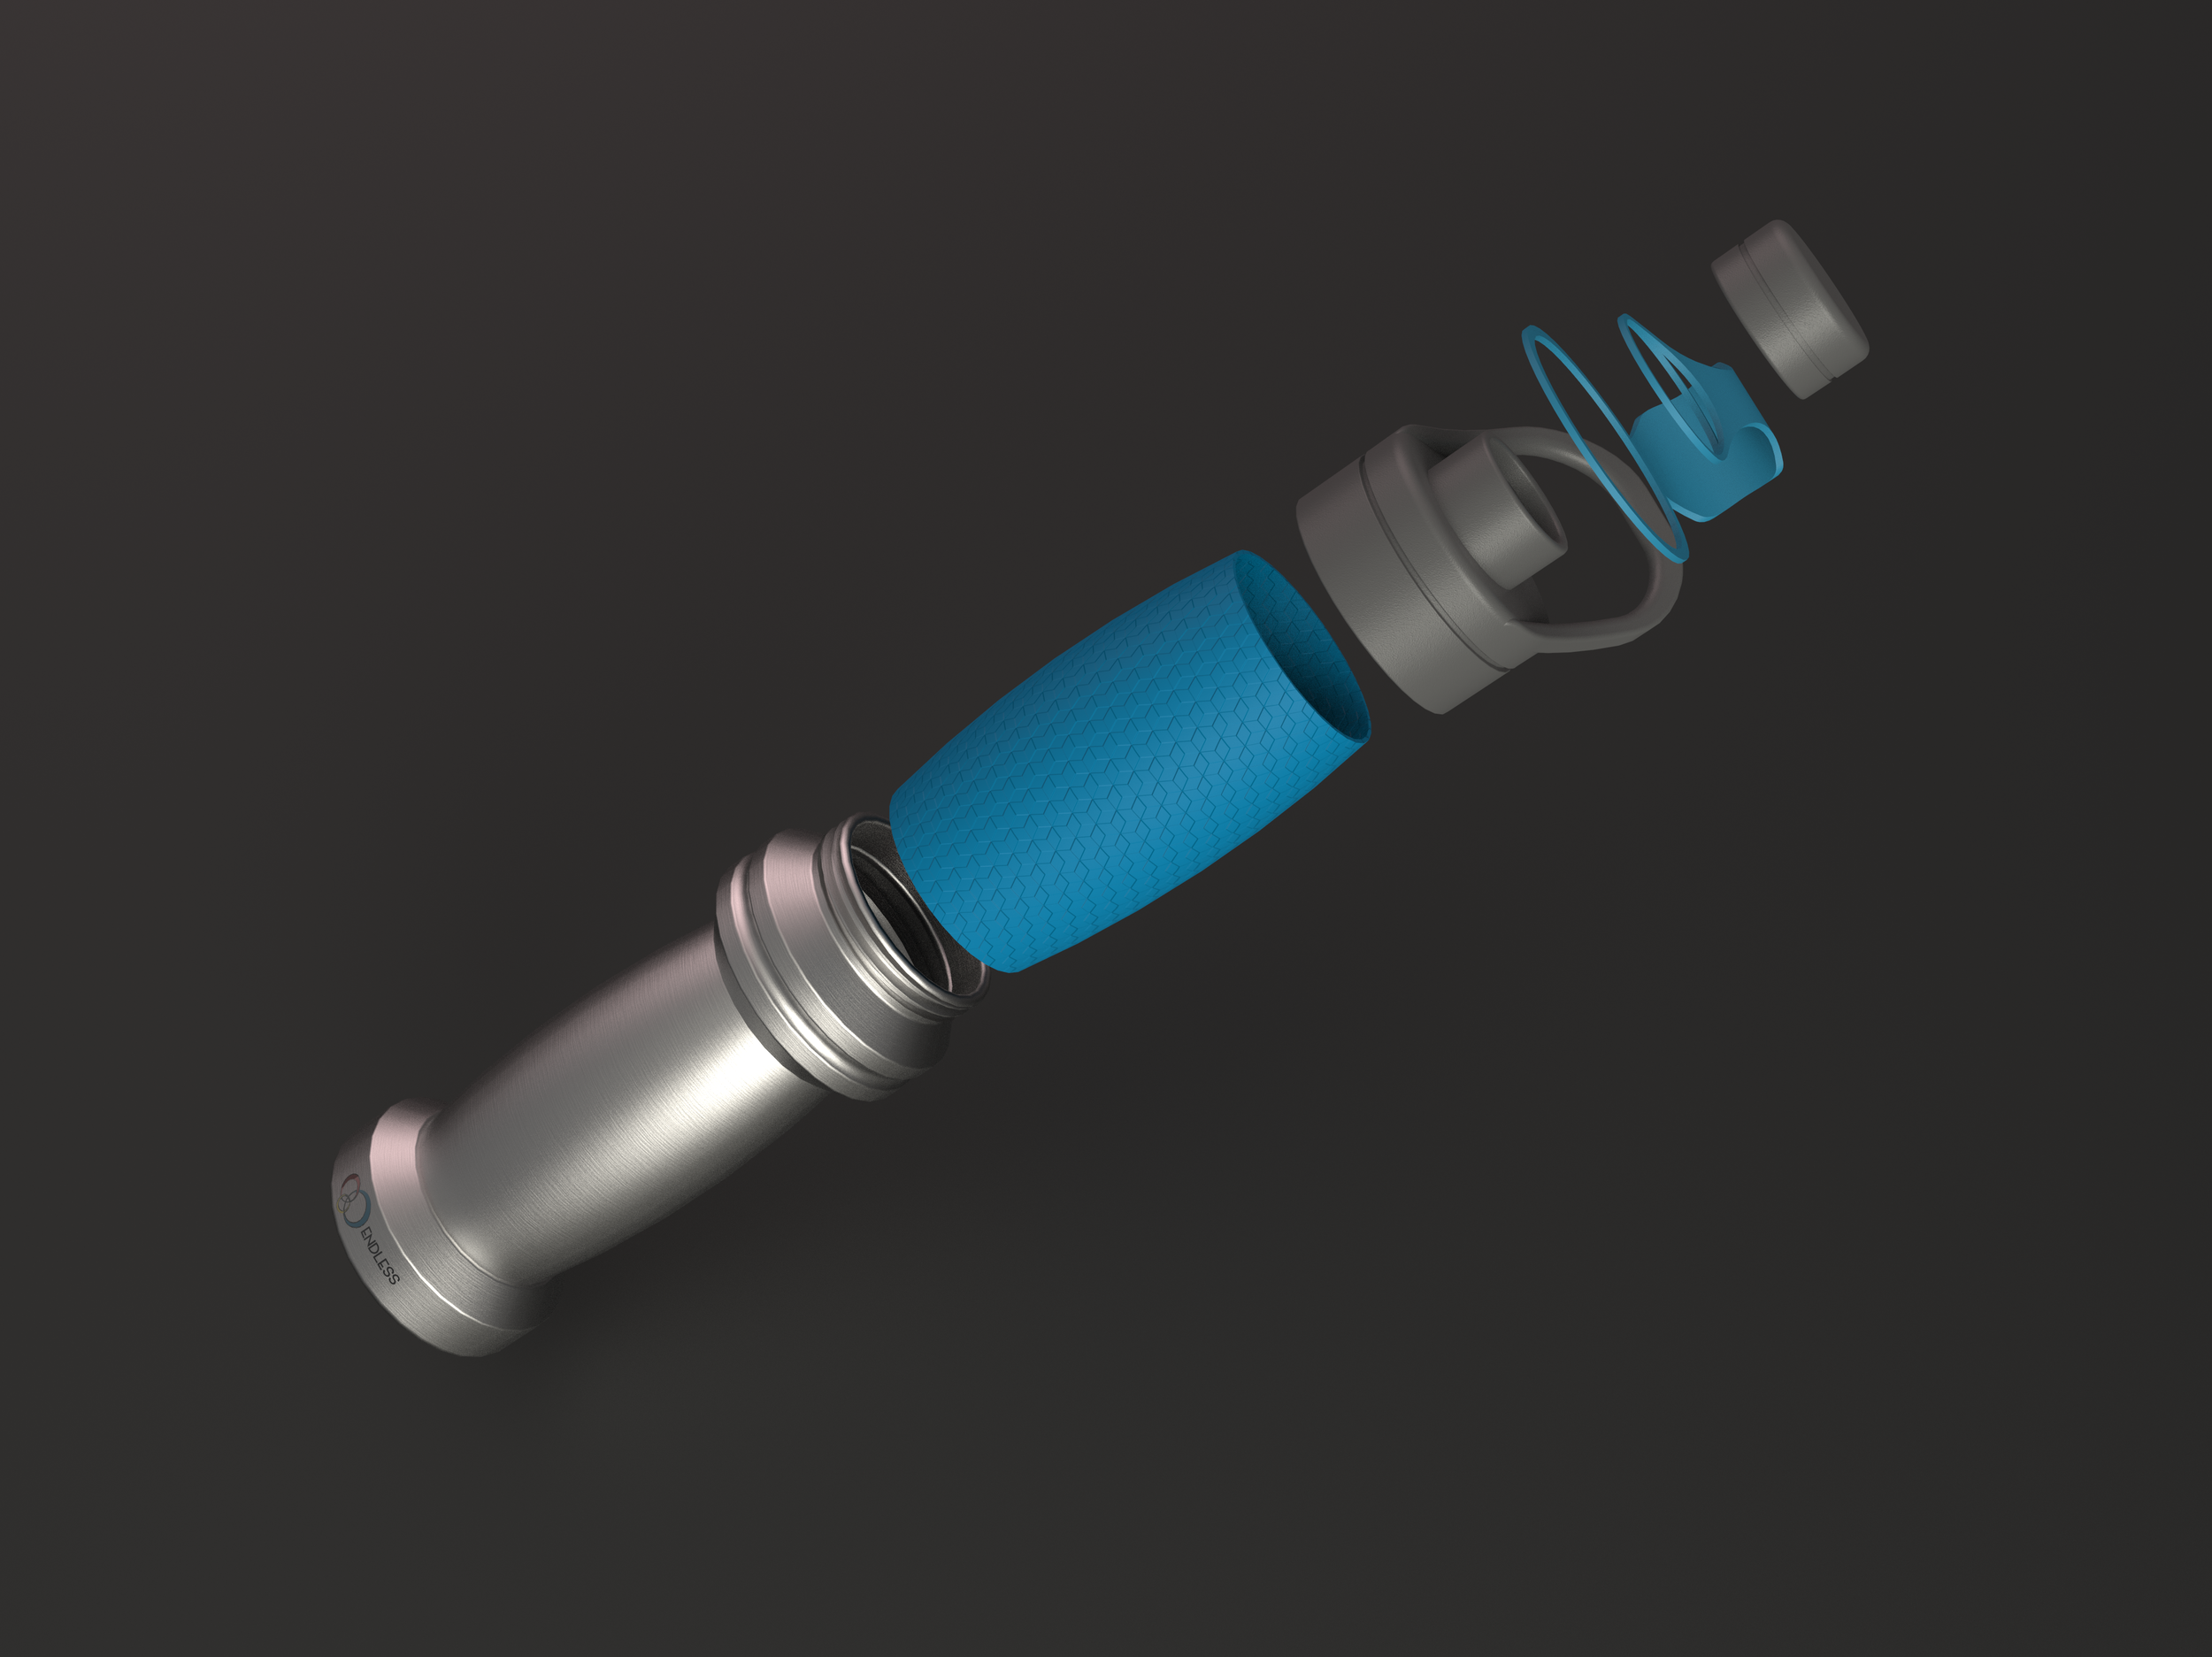
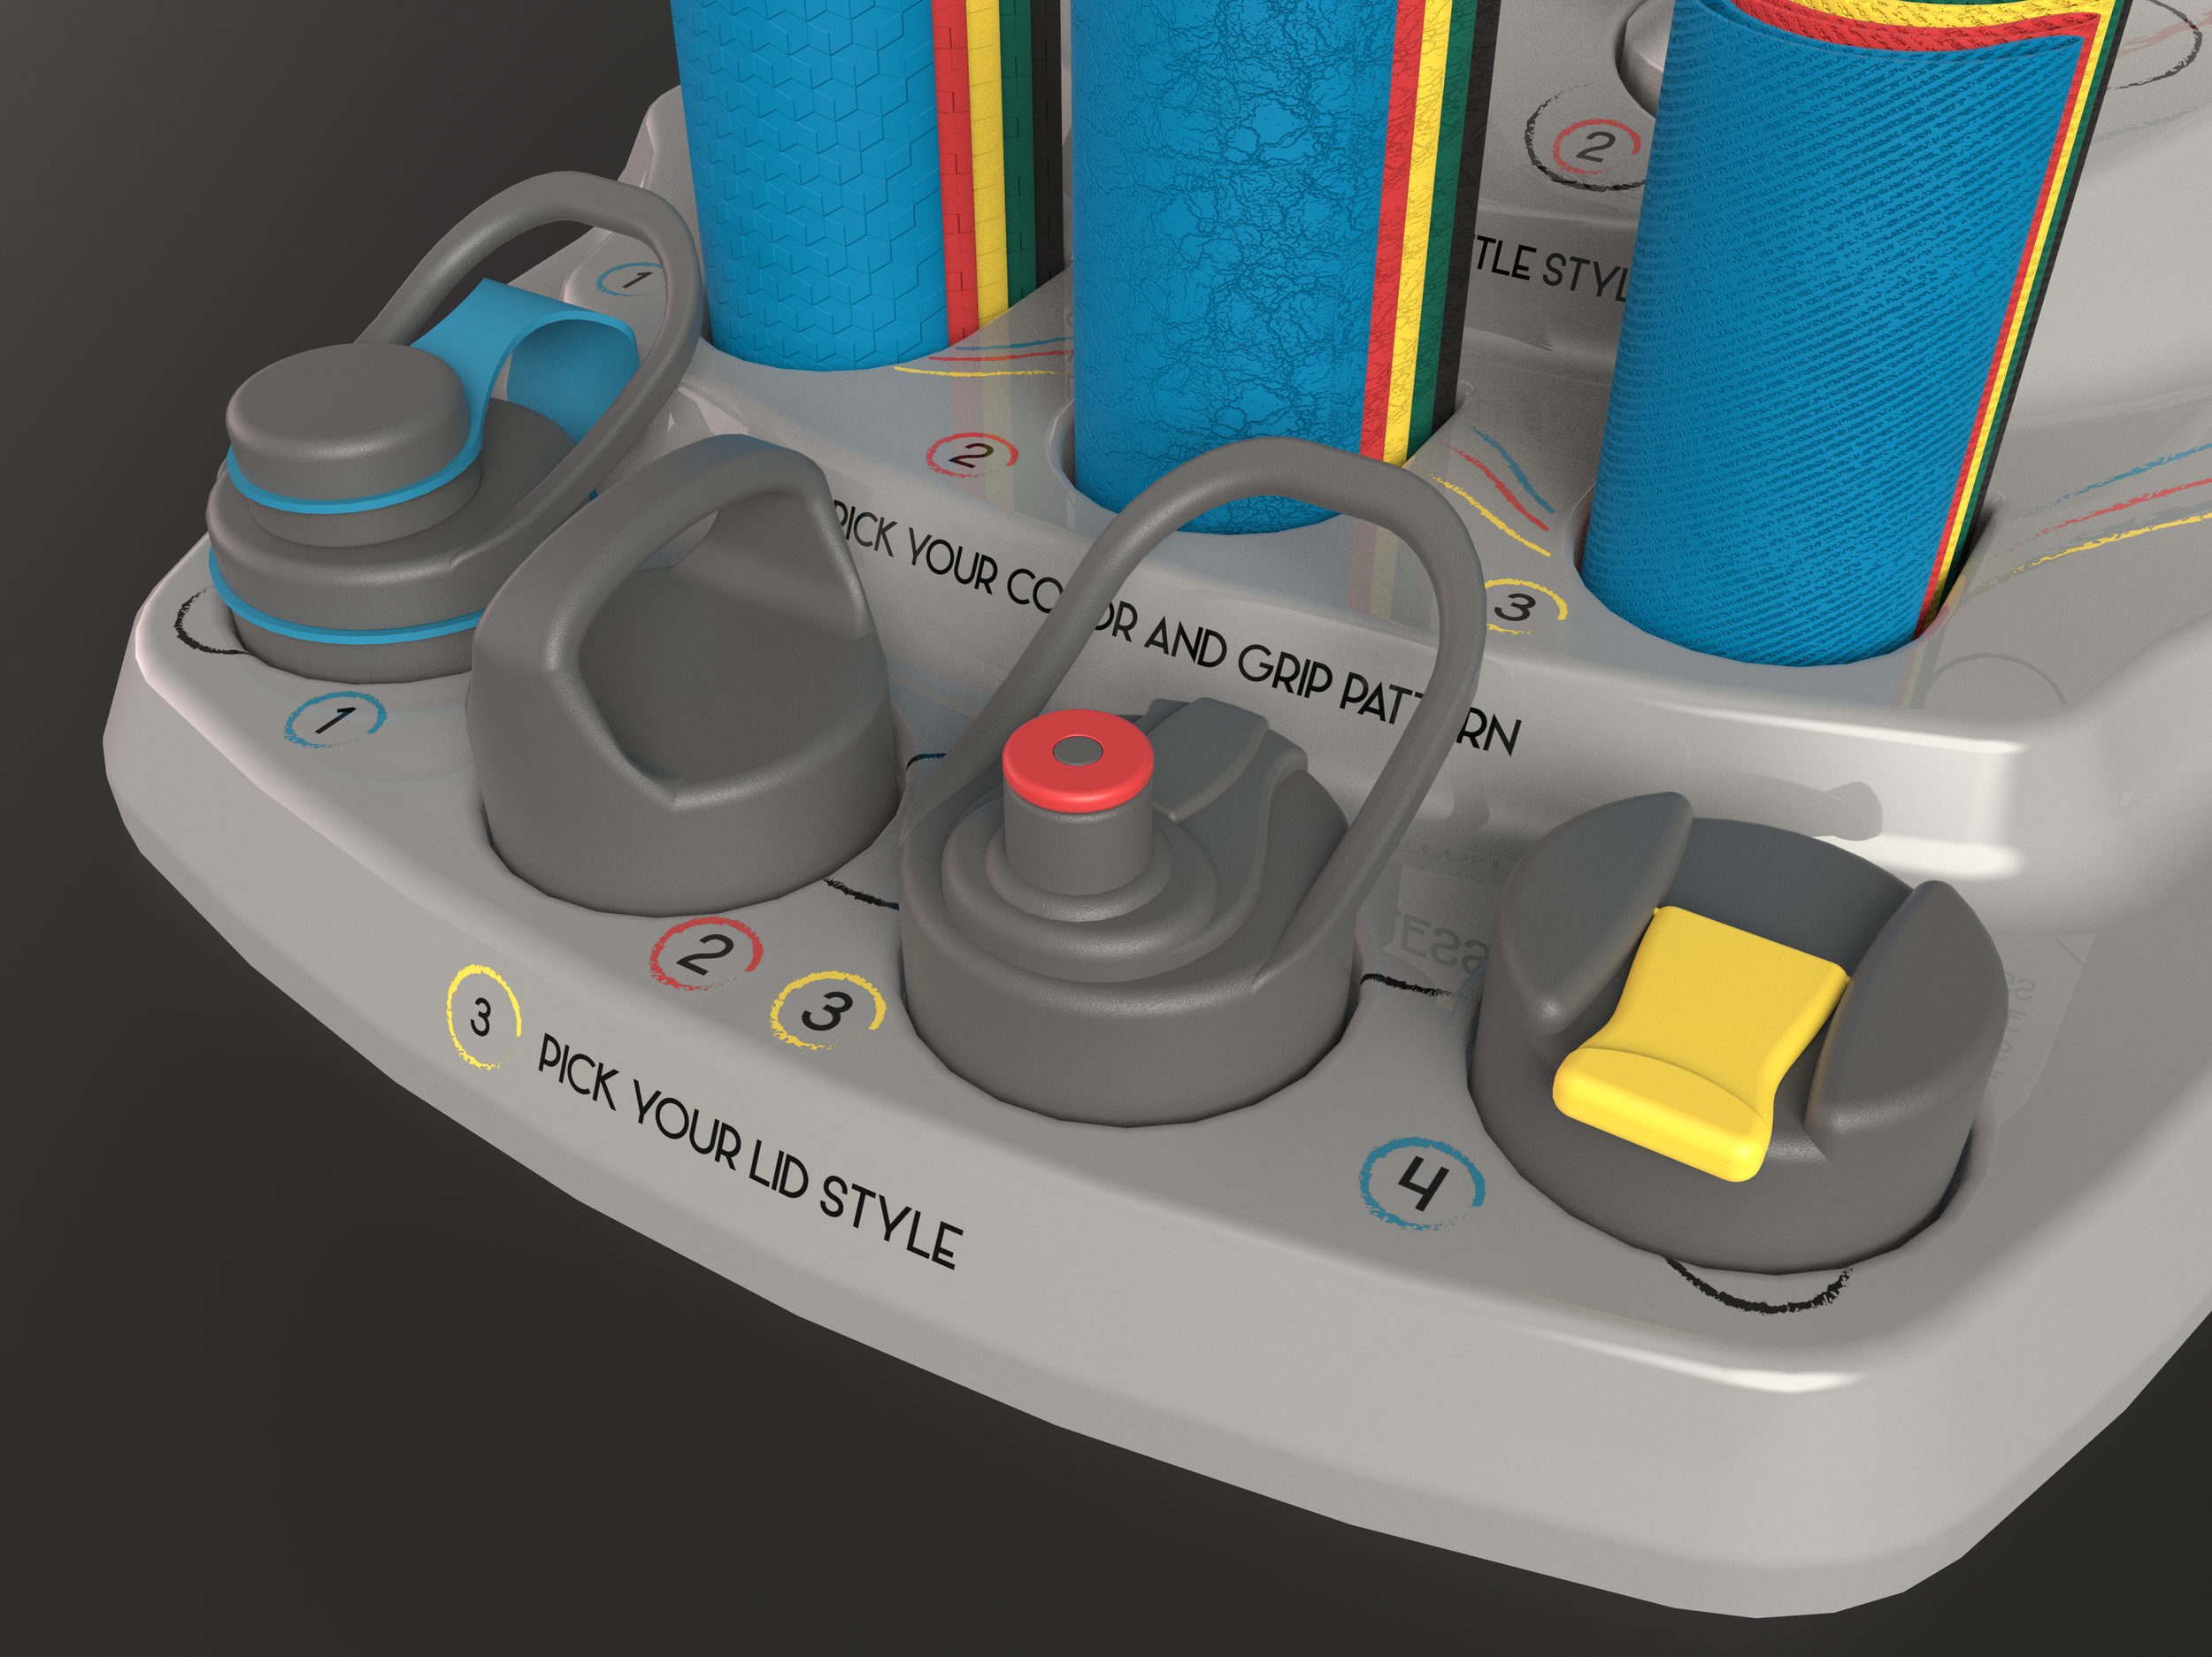
Lid Components
These auxiliary sketches display the parts that make up each of the lids.
Small-Mouth Lid
consists of the main body, the small cap, and the plastic rings that attach the small cap to the main body; small cap screws onto the main body; handle for carrying
Wide-Mouth Lid
consists of the main body that screws onto the bottles
Sport Lid
consists of the main body and the bite cap; bite cap can slide up and down to either let liquid out or keep liquid in; handle for carrying
Coffee Lid
consists of the main body and the hinged lid; hinged lid attached to the main body by the hinge and can be lifted up or down; hinge lid can snap into the main body to keep liquid in
Customizing Process
Step by step process of how the bottle goes together.
Step 1 - Pick your bottle style
Step 2 - Pick your grip sleeve color and texture
Step 3 - Slide the grip sleeve onto the body of the bottle so that it fits into the grooves around the middle
Step 4 - Pick your lid
Step 5 - Screw the lid onto the top of the bottle